
Solving one-step equations is a fundamental concept in mathematics, serving as the building block for more complex problem-solving skills, with addition and subtraction being essential operations.
Foundation for Advanced Mathematical Problem-Solving
The ability to solve one-step equations is a crucial foundation for advanced mathematical problem-solving, as it enables individuals to develop a strong understanding of mathematical concepts and operations, including addition and subtraction, which are essential for more complex calculations and problem-solving strategies, and royalty-free resources, such as stock illustrations and vector graphics, can be used to support learning and practice, with online resources providing a wealth of information and materials to help individuals develop their mathematical skills and knowledge, including worksheets and practice exercises that can be used to reinforce understanding and build confidence, and by using these resources, individuals can develop a solid foundation in mathematical problem-solving, which is essential for success in a wide range of fields and disciplines, including science, technology, engineering, and mathematics, and can help individuals to develop the skills and knowledge they need to succeed in their chosen career or field of study, and to achieve their goals and aspirations, with mathematical problem-solving being a key component of many areas of study and work, and one-step equations being a fundamental part of this, and by mastering these equations, individuals can develop a strong foundation for more advanced mathematical concepts and problem-solving strategies, and can build their skills and knowledge in a progressive and logical way, with each new concept and skill building on previous knowledge and understanding, and enabling individuals to develop a deep and lasting understanding of mathematical concepts and principles.
Methods for Solving One-Step Equations
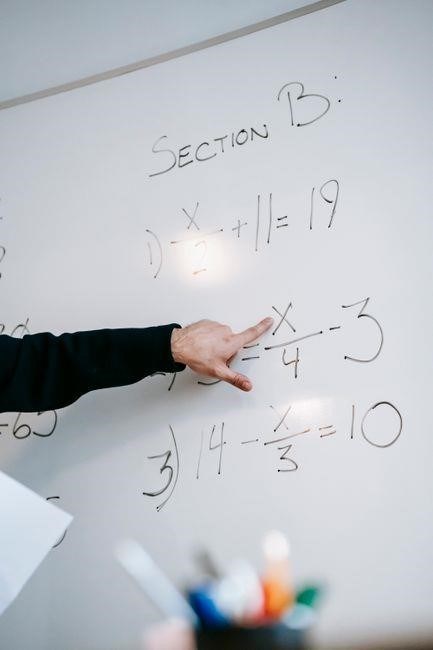
There are three main methods for solving one-step equations: addition and subtraction, multiplication and division, and using inverse operations to isolate the variable.
Addition and Subtraction Method
The addition and subtraction method involves using these operations to isolate the variable on one side of the equation, with addition being used to counteract subtraction and vice versa, allowing students to practice and master this skill through worksheets and exercises, such as those found in PDF format, which provide a convenient and accessible way to learn and review the material, including addition and subtraction problems, which are essential for building a strong foundation in mathematics, and can be used to supplement classroom instruction or as a study aid for students who need extra practice or review, with many resources available online, including websites and educational platforms that offer a wide range of addition and subtraction worksheets and exercises for students to practice and improve their skills, and can be used to track progress and identify areas where students need extra help or review, making it an essential tool for teachers and students alike, and can be used in a variety of settings, including classrooms, tutoring sessions, and homeschooling environments, and can be adapted to meet the needs of students with different learning styles and abilities, making it a valuable resource for anyone looking to improve their mathematics skills.
Multiplication and Division Method
The multiplication and division method is another approach to solving one-step equations, where students use these operations to isolate the variable, with multiplication being used to counteract division and vice versa, allowing for flexibility and creativity in problem-solving, and can be used in conjunction with addition and subtraction methods to provide a comprehensive understanding of one-step equations, and can be practiced using worksheets and exercises that involve multiplication and division operations, such as those found in PDF format, which provide a convenient and accessible way to learn and review the material, including multiplication and division problems that are essential for building a strong foundation in mathematics, and can be used to develop problem-solving skills and critical thinking, and can be used in a variety of settings, including classrooms, tutoring sessions, and homeschooling environments, and can be adapted to meet the needs of students with different learning styles and abilities, making it a valuable resource for anyone looking to improve their mathematics skills, and can be used to enhance understanding of mathematical concepts and relationships, and can be used to build confidence and fluency in solving one-step equations.

Using Inverse Operations Method
The inverse operations method is a powerful technique for solving one-step equations, where students use inverse operations to isolate the variable, such as using addition to counteract subtraction, and multiplication to counteract division, and can be used to solve equations involving fractions, decimals, and integers, and can be practiced using worksheets and exercises that involve inverse operations, such as those found in PDF format, which provide a convenient and accessible way to learn and review the material, including video tutorials and interactive activities that demonstrate the use of inverse operations, and can be used to develop problem-solving skills and critical thinking, and can be used in a variety of settings, including classrooms, tutoring sessions, and homeschooling environments, and can be adapted to meet the needs of students with different learning styles and abilities, making it a valuable resource for anyone looking to improve their mathematics skills, and can be used to enhance understanding of mathematical concepts and relationships, and can be used to build confidence and fluency in solving one-step equations, and can be used to prepare students for more advanced math topics, such as algebra and geometry, and can be used to support students who are struggling with one-step equations, and can be used to challenge students who are advanced in their math skills.
Importance of Practice Worksheets
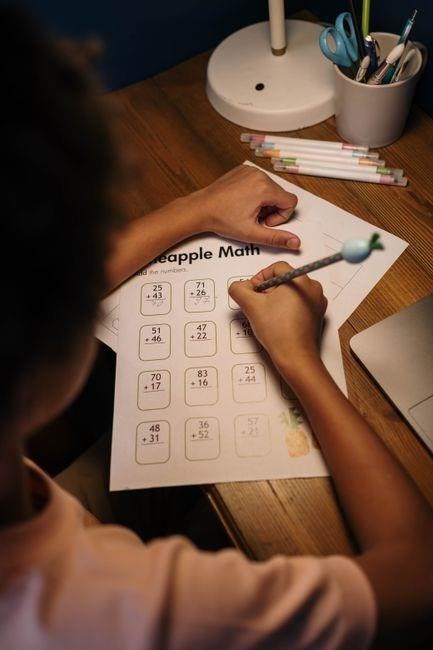
Practice worksheets are essential for mastering one-step equations, providing hands-on experience and reinforcing mathematical concepts, with PDF formats offering convenience and accessibility.
Availability of Royalty-Free Stock Illustrations
There are numerous royalty-free stock illustrations available, with websites offering a wide range of images and vector graphics for educational purposes, including mathematics and problem-solving concepts, such as addition and subtraction worksheets, which can be downloaded and used in PDF formats, making it easier for teachers and students to access and utilize these resources for learning and teaching purposes, with search functions allowing users to find specific illustrations and graphics related to mathematics and education, and with the availability of these resources being convenient and accessible for everyone, including students, teachers, and educators, and with the quality of these illustrations and graphics being high and reliable, making them suitable for use in educational settings, and with the variety of illustrations and graphics available being wide and diverse, including images and graphics related to addition, subtraction, multiplication, and division, and with the availability of these resources being constant and reliable, making it easier for users to access and utilize them, and with the benefits of using these resources being numerous and significant, including improved learning outcomes and increased engagement in mathematics and problem-solving activities.
Types of Worksheets
There are various types of worksheets, including addition and subtraction worksheets, available in PDF format, suitable for math practice and problem-solving exercises, with images and vector graphics to aid learning.

Subtraction Worksheet Stock Illustrations
There are 4,700 subtraction worksheet stock illustrations and vector graphics available royalty-free, which can be used to create engaging math worksheets for practice and problem-solving exercises, with images and art to aid learning and understanding of subtraction concepts, making it easier for students to visualize and comprehend the material, and with the use of colorful and attractive illustrations, students can develop a positive attitude towards math and learning, and with the availability of royalty-free images, teachers and educators can create customized worksheets that cater to the needs of their students, and with the use of technology, these illustrations can be easily accessed and downloaded, making it convenient for teachers and students to use them in their math lessons and activities, and with the variety of illustrations available, teachers can choose the ones that best suit their teaching style and the needs of their students, and with the use of subtraction worksheet stock illustrations, students can develop their problem-solving skills and critical thinking, and with the practice and repetition of subtraction concepts, students can build their confidence and fluency in math, and with the use of technology and online resources, students can access a wide range of educational materials and resources to support their learning and development in math and problem-solving.
Addition and Subtraction Worksheet Stock Illustrations
There are 2,600 addition and subtraction worksheet stock illustrations and vector graphics available royalty-free, which can be used to create engaging math worksheets for practice and problem-solving exercises, with images and art to aid learning and understanding of addition and subtraction concepts, making it easier for students to visualize and comprehend the material, and with the use of colorful and attractive illustrations, students can develop a positive attitude towards math and learning, and with the availability of royalty-free images, teachers and educators can create customized worksheets that cater to the needs of their students, and with the use of technology, these illustrations can be easily accessed and downloaded, making it convenient for teachers and students to use them in their math lessons and activities, and with the variety of illustrations available, teachers can choose the ones that best suit their teaching style and the needs of their students, and with the use of addition and subtraction worksheet stock illustrations, students can develop their problem-solving skills and critical thinking, and with the practice and repetition of addition and subtraction concepts, students can build their confidence and fluency in math, and with the use of online resources, students can access a wide range of educational materials and resources to support their learning and development in math and problem-solving, and teachers can use these illustrations to create interactive and engaging lessons, and with the feedback from students, teachers can adjust their teaching methods to better meet the needs of their students, and with the use of addition and subtraction worksheet stock illustrations, students can develop a strong foundation in math and problem-solving, and with the support of teachers and educators, students can achieve their full potential in math and problem-solving.

Benefits of Using Worksheets
Using worksheets provides numerous benefits, including improved understanding and retention of mathematical concepts, with regular practice and review of addition and subtraction skills.

Development of Problem-Solving Skills
Developing problem-solving skills through worksheets is crucial for students, as it enables them to approach problems in a logical and methodical manner, using addition and subtraction to solve equations and build confidence in their mathematical abilities, with regular practice and review of concepts, allowing them to apply their knowledge to real-world problems and develop critical thinking skills, which are essential for academic success and future careers, by utilizing worksheets as a tool for learning and improvement, and enhancing their overall mathematical understanding and problem-solving abilities, with a strong foundation in addition and subtraction concepts.
Improvement of Mathematical Understanding
Improving mathematical understanding through practice worksheets is essential for students, as it reinforces their knowledge of mathematical concepts, including addition and subtraction, and helps them to develop a deeper understanding of mathematical relationships and patterns, by utilizing worksheets as a tool for learning and improvement, and enhancing their overall mathematical understanding and problem-solving abilities, with a strong focus on conceptual understanding and mathematical reasoning, allowing them to apply their knowledge to real-world problems and develop critical thinking skills, which are essential for academic success and future careers, by building a strong foundation in mathematics and continuously improving their mathematical understanding through practice and review of addition and subtraction concepts, and developing a growth mindset towards mathematics, with a positive attitude towards learning and improvement, and recognizing the importance of mathematics in real-world applications and everyday life, by utilizing real-world examples and applications to illustrate mathematical concepts and demonstrate their relevance to real-world problems and scenarios, and providing opportunities for students to apply their knowledge and skills to real-world problems and scenarios, and developing problem-solving skills through mathematical modeling and simulation, and utilizing technology to enhance mathematical understanding and problem-solving skills, with a strong focus on mathematical accuracy and precision, and developing a strong understanding of mathematical notation and terminology, and utilizing mathematical tools and software to solve mathematical problems and model real-world scenarios, and developing a strong foundation in mathematics and continuously improving their mathematical understanding through practice and review of addition and subtraction concepts, and recognizing the importance of mathematics in real-world applications and everyday life.