Month: September 2025

hero 5 black user manual

The GoPro Hero 5 Black is a high-performance sportscam designed for capturing stunning 4K videos and high-quality photos in various action-packed environments. It features a 2-inch touchscreen, voice control, and enhanced image stabilization, making it a reliable choice for outdoor enthusiasts. With improved features like RAW photo capture and automatic cloud upload, it offers a seamless experience for adventurers and content creators alike.

Overview of the Camera

The GoPro Hero 5 Black is a compact, rugged, and waterproof action camera designed for capturing high-quality 4K videos and 12MP photos. It features a 2-inch touchscreen display for easy navigation, voice control for hands-free operation, and built-in GPS for location tracking. The camera is waterproof up to 33 feet without an additional housing and supports advanced features like Electronic Image Stabilization (EIS) for smoother footage. It also offers RAW photo capture, automatic low-light adjustment, and seamless integration with GoPro’s cloud storage service. With its sleek design and robust functionality, the Hero 5 Black is an excellent tool for adventurers, vloggers, and anyone seeking to capture dynamic content on the go.

Key Features and Improvements

The GoPro Hero 5 Black introduces several groundbreaking features, starting with its enhanced 4K video recording at 30fps and 12MP photo capture with improved low-light performance. It boasts voice control for hands-free operation, allowing users to start or stop recording with simple voice commands. The camera also features RAW photo capture, enabling greater flexibility in post-processing. Additionally, it includes Electronic Image Stabilization (EIS) for smoother footage and a wider dynamic range for better detail in high-contrast scenes. The Hero 5 Black is also waterproof up to 33 feet without an external case and supports GPS integration for location tracking. These improvements make it a versatile and powerful tool for capturing high-quality content in various conditions.

Unboxing and Initial Setup

Inside the box, you’ll find the Hero 5 Black camera, a rechargeable battery, and a USB-C cable. Start by charging the battery fully and inserting it into the camera. Power it on, select your language, and connect to the GoPro app for initial setup. Ensure your camera is updated to the latest firmware for optimal performance.

What’s Included in the Box

The Hero 5 Black includes the camera, a rechargeable battery, a USB-C cable for charging and data transfer, and adhesive mounts for easy attachment to surfaces. These accessories provide everything needed to begin capturing high-quality footage immediately. Ensure all items are present upon unboxing to ensure a smooth start with your new device.

First-Time Setup and Configuration

Inserting the battery and charging it is the first step. Next, insert a compatible memory card to ensure functionality. Turn on the camera, and it will enter setup mode. Follow on-screen instructions to complete initial configuration. Connecting to a smartphone or computer is essential for software updates and remote control. Use the USB-C cable for charging and data transfer. Ensure the camera is properly powered on and the screen is responsive. This process ensures the device is ready for optimal use.

Camera Design and Layout

The GoPro Hero 5 Black features a rugged, compact design with a rubberized exterior for durability. It is waterproof up to 10 meters without housing. Lightweight and portable, it includes a 2-inch touchscreen for easy navigation and control.

Physical Features and Buttons

The GoPro Hero 5 Black has a compact, rugged design with a rubberized exterior for enhanced grip. It features a shutter button on top for starting/stopping recordings and capturing photos. The mode button on the side cycles through camera modes, while the power button on the right powers the camera on/off. A USB-C port and HDMI port are located on the side for connectivity. The camera also includes a built-in mounting system for attaching accessories. Its dimension is 3.0 x 4.0 x 2.6 inches, and it weighs 118 grams, making it highly portable. These physical features ensure ease of use and durability.

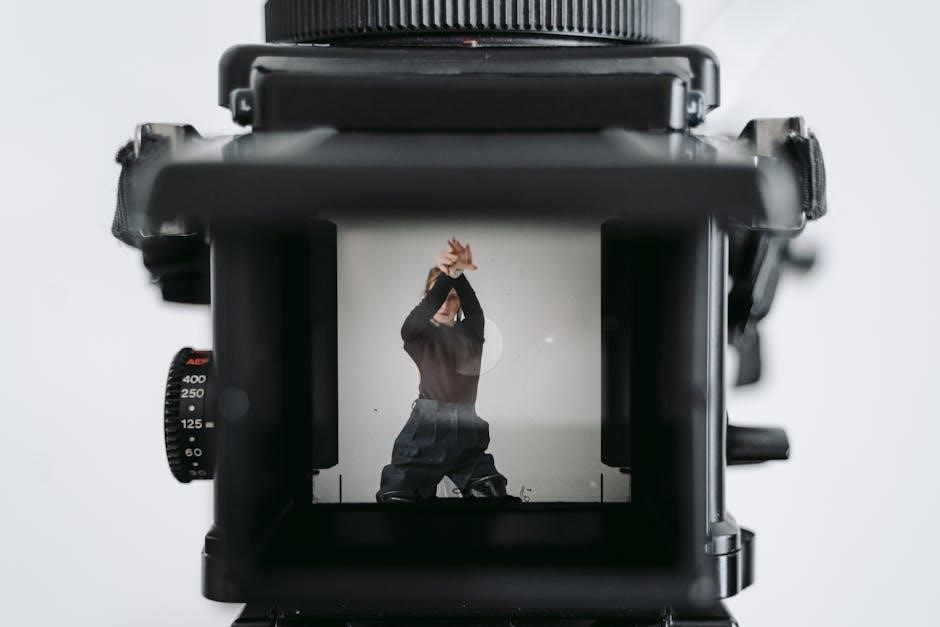
Understanding the Touch Display

The GoPro Hero 5 Black features a 2-inch touchscreen display for intuitive control. The screen is responsive and vibrant, allowing users to preview footage, adjust settings, and navigate menus with ease. Key elements include the mode menu (accessed by swiping down), preview window for live viewing, and settings icon (gear symbol) for customization. Users can tap, swipe, or pinch to interact with the display. The screen also shows essential info like battery life, storage, and mode selection. A touch-sensitive shutter button starts/stops recording, while swiping up reveals recent clips. The display is adjustable in brightness and supports customizable home screens for quick access to favorite settings. This makes the Hero 5 Black both user-friendly and versatile for capturing content on the go.

Camera Modes

The GoPro Hero 5 Black offers multiple camera modes, including Video, Photo, Time Lapse, Burst, and Night modes, each tailored for specific shooting scenarios and needs.

Video Mode and Settings

In Video Mode, the GoPro Hero 5 Black captures stunning 4K footage at up to 30fps, with options for lower resolutions like 1080p and 1440p for flexibility. Users can adjust frame rates, field of view (Wide, Medium, Narrow), and stabilization settings to fine-tune their recordings. Additional features include a flat color profile for post-production and the ability to disable electronic image stabilization for mounting on gimbals. Protune settings allow advanced users to control white balance, exposure compensation, and ISO limits for optimized video quality in various lighting conditions. These settings can be adjusted via the touchscreen or the GoPro app for convenience.

Photo Mode and Capture Options

The GoPro Hero 5 Black excels in Photo Mode, delivering 12MP images with enhanced dynamic range for vibrant colors and sharp details. Users can choose between JPEG or RAW file formats for flexibility in post-processing. Night Photo mode is ideal for low-light scenes, capturing crisp images with reduced noise. Burst Mode allows for up to 30 photos per second, perfect for action shots. Additional options include self-timer, auto HDR, and voice control for hands-free operation. Protune settings enable advanced adjustments like white balance, ISO limits, and sharpness to tailor photos to specific lighting conditions. These features make the Hero 5 Black versatile for photographers.

Time Lapse Mode and Interval Settings

The GoPro Hero 5 Black offers a robust Time Lapse Mode, enabling users to capture stunning sequences of photos at customizable intervals. The camera allows intervals of 1 second, 2 seconds, 5 seconds, 10 seconds, 30 seconds, or 60 seconds, providing flexibility for various scenarios. Time Lapse videos can be auto-generated in-camera, saving time during post-production. Night Lapse is also available for low-light conditions, with intervals adjustable to 4, 8, 15, or 20 seconds. Protune settings further enhance control, enabling adjustments to ISO, exposure compensation, and white balance. This feature is ideal for capturing sweeping landscapes, events, or creative projects, making it a versatile tool for both professionals and enthusiasts.

Advanced Features

The Hero 5 Black offers advanced features like RAW photo capture, built-in waterproofing, and 4K video at 30fps. It also includes touch zoom for precise framing.

Voice Control and Commands

The Hero 5 Black supports voice control, enabling hands-free operation. Users can start or stop recording, take photos, or tag moments with simple voice commands. Available in multiple languages, this feature enhances convenience. To use voice commands, ensure the camera is powered on and voice control is enabled in the settings. Commands like “GoPro, start recording” or “GoPro, take a photo” execute functions instantly. The camera confirms commands with beeps and on-screen icons. Voice control works up to 33 feet away, making it ideal for capturing footage in challenging situations. This feature is particularly useful for solo shooters or when the camera is out of reach. Clear pronunciation and minimal background noise ensure reliable performance. Voice control simplifies operation, allowing users to focus on their activity while controlling the camera effortlessly.

Using the Touch Display for Adjustments

The Hero 5 Black’s 2-inch LCD touch display allows for intuitive adjustments. Users can navigate through settings, preview shots, and modify parameters like brightness, contrast, and exposure. The touch interface is responsive, enabling quick changes without physical button navigation. ProTune settings can be accessed via the display, offering advanced control over features like white balance, ISO, and sharpness. The display also supports gestures, such as swiping to switch between modes or zooming in/out for precise framing. This feature enhances usability, making it easier to fine-tune settings for optimal results. Regular screen cleaning is recommended to maintain responsiveness and clarity in all lighting conditions.

Electronic Image Stabilization (EIS)

Electronic Image Stabilization (EIS) on the Hero 5 Black minimizes camera shake and blur, delivering smoother footage. It’s especially effective for handheld or dynamic shots. EIS automatically adjusts the frame, counteracting unintended movements. This feature is available in select video settings, including up to 4K at 30fps. While EIS enhances stability, it may slightly crop the field of view to accommodate the stabilization process. For optimal results, EIS should be used in well-lit conditions, as low light can limit its effectiveness. Users can disable EIS if desired, though it’s a valuable tool for capturing professional-grade, shake-free videos in most scenarios.

Connectivity and Storage

The Hero 5 Black features built-in Wi-Fi and Bluetooth for seamless connectivity and content transfer. It supports microSD cards up to 128GB for storage solutions.

Wi-Fi and Bluetooth Connectivity

The GoPro Hero 5 Black offers robust Wi-Fi and Bluetooth capabilities for seamless connectivity. Wi-Fi enables fast video and photo transfers to smartphones or computers, while Bluetooth provides low-power pairing for quick connections. The camera automatically pairs with the GoPro app, allowing remote control, live preview, and easy sharing. Wi-Fi supports 2.4GHz and 5GHz bands for stable and high-speed transfers. Bluetooth Low Energy ensures efficient battery use during pairing. These features enhance workflow, enabling users to manage content wirelessly and control the camera remotely. Connectivity options are intuitive, making it easy to integrate the Hero 5 Black into your ecosystem for optimal performance and convenience.

Memory Card Requirements and Management

The GoPro Hero 5 Black requires a microSD card for storing photos and videos. It supports microSD, microSDHC, and microSDXC cards with capacities up to 128GB. For optimal performance, use a card with a U3 or higher speed rating. Before first use, format the card in the camera to ensure compatibility. The camera can record in 4K and high frame rates, so a fast card is essential. Avoid using multiple cards without formatting them first, as this can cause issues. Always eject the card properly to prevent data loss. Regularly check storage space and manage files to maintain smooth operation and avoid running out of space during shoots.

User Experience

The GoPro Hero 5 Black offers an intuitive and responsive user experience, featuring a sleek design, touch display, and customizable settings for seamless operation and enhanced creativity.

Navigating the Menu System

The Hero 5 Black features a user-friendly menu system accessible via the touch display. Swipe left or right to cycle through available options like video, photo, and settings. Tap to select a mode or adjust parameters. The menu is organized into categories, making it easy to find specific features. Use the back button (located at the bottom left) to return to previous screens. For quick access, some settings like resolution and frame rates can be adjusted directly from the main interface. This streamlined design ensures intuitive navigation, allowing users to focus on capturing content without unnecessary complexity.

Tips: Swipe up from the bottom to access recently used settings for faster adjustments. Use voice commands to bypass manual navigation for common tasks like starting or stopping recording.

Customizing Settings for Optimal Use

The Hero 5 Black allows extensive customization to tailor the camera to your preferences. Enable Protune for manual control over settings like white balance, ISO, and exposure compensation. Adjust audio settings to enhance sound quality or reduce wind noise. Voice commands can be personalized for quick access to frequently used functions. Customize the touch display to prioritize shortcuts for your most-used modes or settings. Additionally, you can optimize memory and battery life by disabling features like GPS or Wi-Fi when not needed. Explore night modes and interval shooting for unique captures. These adjustments ensure the camera adapts to your shooting style, enhancing both convenience and creativity.

Experiment with settings to find the perfect balance for your workflow and preferences.

Troubleshooting Common Issues

Common issues with the Hero 5 Black often relate to connectivity or memory card errors. If the camera fails to turn on, ensure the battery is charged or try a different charger. For SD card problems, format the card in the camera or replace it if corrupted. Connectivity issues with the GoPro app can be resolved by restarting the camera, ensuring Wi-Fi is enabled, and updating both the camera and app software. Freezing or slow performance may require a factory reset, which can be done through the settings menu. Regular software updates help resolve bugs and improve functionality. Always refer to GoPro’s support site for detailed solutions.

Addressing these issues promptly ensures uninterrupted use and optimal performance of your Hero 5 Black.

Capturing the Best Footage

Use electronic image stabilization, shoot in well-lit conditions, and frame shots carefully. Ensure memory cards are compatible and batteries are fully charged for uninterrupted recording.

Tips for Video Recording

Tips for Video Recording

For optimal video quality, enable electronic image stabilization and shoot in well-lit environments. Use a polarizing filter to reduce glare and enhance colors. Mount the camera securely to minimize shake. Shoot in 4K at 30fps for crisp footage or 1080p at 120fps for slow-motion. Avoid overexposure by adjusting the Protune settings. Use the touchscreen to focus on subjects and adjust exposure. Panning should be done slowly and smoothly. Ensure the memory card is formatted and of sufficient capacity. Keep the battery charged or use an external power source for extended shoots. Regularly clean the lens and housing to prevent smudges or water spots. Practice makes perfect—experiment with angles and settings to capture stunning footage every time.

Best Practices for Photography

For stunning photos, use the Hero 5 Black’s 12MP resolution and RAW file format for maximum detail. Enable Protune to adjust white balance, ISO, and exposure for better control. Shoot in Single Shot mode for stationary subjects or Burst Mode for action. Use Night Photo mode for low-light scenarios. The wide-angle lens is ideal for landscapes, but consider using the Linear Field of View for less distortion. Use the touchscreen to adjust focus and exposure settings. Stabilize the camera with a tripod or Gimbal for sharper images. Capture during the golden hour for vibrant colors. Experiment with unique angles and compositions for creative results. Regularly review and delete unwanted photos to conserve memory. Enable voice commands for hands-free shooting convenience.

Accessories and Software

Explore GoPro’s official accessories like mounts, housings, and Remo for enhanced functionality. Utilize GoPro Quik and Splice for editing and sharing content seamlessly.

Recommended Accessories

The GoPro Hero 5 Black can be enhanced with a variety of official accessories. A spare battery and dual battery charger ensure extended shooting sessions. The Supercharger is ideal for quick power-ups. The Protective Housing offers waterproofing up to 40m and protects against rough conditions. For mounts, the Curve + Jaws Clamp is versatile, while the Shorty and Extension Pole provide flexibility. Remo, a voice-controlled remote, adds convenience. A high-speed memory card (U3 or V30 rating) is essential for 4K video. Additional items like the Frame for mounting and a Pro 3.5mm microphone enhance functionality and audio quality, ensuring optimal performance in various scenarios.

Using GoPro Software for Editing

GoPro offers powerful editing software to enhance your Hero 5 Black footage. GoPro Studio and Quik are two popular options for post-production. Quik allows seamless import, editing, and export of videos with intuitive controls. It automatically creates highlight reels and supports customizable templates. For advanced editing, GoPro Studio provides chroma keying, time-lapse, and multi-track audio features. Both tools support 4K video and are compatible with Windows and macOS. These software solutions enable users to refine their content, add effects, and produce professional-looking videos effortlessly. Regular updates ensure compatibility with the latest camera models and features, making them essential for optimizing your Hero 5 Black content.

The GoPro Hero 5 Black is a versatile, user-friendly camera with advanced features for capturing stunning footage. Its reliability and performance make it a top choice for creators.

Final Thoughts and Benefits

The GoPro Hero 5 Black is a powerful tool for capturing high-quality content, offering 4K video, 12MP photos, and robust stabilization. Its rugged, waterproof design makes it ideal for outdoor adventures. The intuitive touch display simplifies navigation, while features like voice control enhance convenience. With excellent low-light performance and advanced EIS, it delivers smooth and professional results. Whether for casual use or professional projects, the Hero 5 Black provides versatility and reliability, making it a top choice for creators seeking durable and high-performance gear. Its benefits ensure outstanding image quality and a seamless user experience.

Encouragement for Further Exploration

Now that you’ve explored the GoPro Hero 5 Black’s features and capabilities, it’s time to take your creativity to the next level! Experiment with different shooting modes, try unique mounting techniques, and push the limits of what’s possible. Share your adventures online, and connect with the vibrant GoPro community to inspire and be inspired. Remember, practice makes perfect—keep experimenting and refining your skills. For more tips and tricks, visit the official GoPro website or explore community forums. The world is your canvas, and the Hero 5 Black is your tool to capture it like never before!

male purewick instructions

The BD PureWick Male External Catheter offers a discreet, non-invasive solution for managing male urinary incontinence. Designed for comfort and ease of use, it reduces reliance on bulky incontinence products, providing a practical alternative for patients and caregivers alike. This system is user-friendly, promoting independence and dignity while ensuring effective urine collection.

Overview of the PureWick System

The PureWick System is a cutting-edge, non-invasive solution designed to manage male urinary incontinence effectively. It consists of an external catheter, a suction unit, and a collection container. The system is activated by gentle suction, which directs urine into the container, eliminating the need for bulky pads or underwear. Its discreet design enhances user comfort and mobility, making it an ideal choice for both patients and caregivers seeking a reliable and hygienic solution.

Importance of Proper Usage

Proper usage of the PureWick System is essential to ensure effectiveness and prevent complications; Correct placement, secure adhesion, and regular monitoring are crucial to avoid leaks and skin irritation. Following the manufacturer’s guidelines helps maintain hygiene and prevents infections. Proper usage also extends the product’s lifespan and optimizes performance, making it a reliable solution for managing urinary incontinence while maintaining patient comfort and dignity.

Benefits of Using the Male PureWick System

The PureWick System offers numerous benefits, including enhanced comfort, reduced need for incontinence products, and improved skin health. It provides a discreet, cost-effective solution for managing urinary incontinence, promoting independence and confidence for users. The system’s innovative design ensures efficient urine collection and minimizes leaks, making it a practical choice for both patients and caregivers seeking a reliable and comfortable alternative.

Convenience and Discreetness

The PureWick System offers unmatched convenience and discreetness, allowing users to manage urinary incontinence effortlessly. Its external catheter design eliminates the need for insertion, making it simple to use and reducing the risk of infections. The compact collection container can be easily hidden, providing privacy and confidence. Users can engage in daily activities without interruption or visible signs of the device, ensuring a normal and dignified lifestyle. This system is ideal for active individuals seeking a subtle, reliable solution.

Reduction of Incontinence Products

The PureWick System significantly reduces reliance on traditional incontinence products like pads or diapers. By collecting urine directly, it minimizes the need for frequent changes and disposable materials. This not only lowers costs over time but also reduces environmental impact. Users benefit from a cleaner, more hygienic alternative, with fewer concerns about leaks or odors. The system streamlines incontinence management, offering a practical solution for those seeking to minimize product usage and maintain dignity.

Improved Skin Health

The PureWick System promotes improved skin health by keeping the genital area dry and free from prolonged moisture. Unlike traditional incontinence products, which can trap urine and irritants, PureWick reduces friction and prevents skin breakdown. This minimizes the risk of rashes, infections, and discomfort. Regular use helps maintain skin integrity, particularly for individuals prone to skin irritation or incontinence-related dermatitis. Proper fitting and adherence to instructions further enhance skin protection and overall comfort.

Cost-Effectiveness

The PureWick System offers significant cost savings compared to traditional incontinence products. By reducing the frequency of pad changes and minimizing waste, it lowers long-term expenses. Additionally, the reusable design extends product lifespan, further cutting costs. Enhanced skin health also reduces the need for medical treatments related to irritation or infection, contributing to overall financial savings for users and caregivers. This makes PureWick a practical and economical choice for managing urinary incontinence effectively.

How the PureWick System Works

The PureWick System uses an external catheter connected to a collection container. Suction draws urine into the container, promoting hygiene and reducing infection risks effectively.

Components of the System

The PureWick System includes an external catheter designed for male anatomy, a collection container, and a suction source. The catheter adheres to the skin, directing urine into the container via suction, ensuring hygiene and efficiency. This design prevents skin irritation and promotes a secure fit, making it suitable for daily use and various lifestyles. The system’s components work together seamlessly to manage urinary incontinence effectively without compromising comfort or discreetness.

Role of Suction in Urine Collection

The PureWick System relies on gentle suction to effectively collect urine. This suction, typically provided by a dedicated device, ensures continuous flow into the collection container. It prevents leakage and keeps the skin dry, reducing irritation. The suction also maintains a closed system, minimizing infection risks. This feature is essential for efficient and hygienic urine management, making the PureWick System both practical and comfortable for users with urinary incontinence needs.

Connection to the Collection Container

The PureWick catheter connects to a collection container via a secure, leak-resistant tube. This connection ensures urine is directed away from the skin and stored safely. The container is designed for easy emptying and cleaning, promoting hygiene. A secure connection prevents spills and maintains a closed system, reducing infection risks. Proper attachment is crucial for effective use, ensuring comfort and reliability during daily activities. This design enhances user confidence and convenience.

Preparation for Using the PureWick System

Prepare by gathering supplies, ensuring the area is clean, and trimming pubic hair if needed. Proper preparation ensures comfort, hygiene, and effective system performance. Always follow guidelines.

Gathering Necessary Supplies

To prepare, collect the PureWick catheter, collection container, suction source, and connecting tubes. Ensure gloves, cleaning wipes, and a towel are available. Having all supplies ready ensures a smooth process and maintains hygiene. Double-check for any additional items recommended. Proper organization prevents delays and ensures effective use of the system. Always verify the integrity of the supplies before proceeding. This step is crucial for a successful and hygienic experience with the PureWick System.

Preparing the Patient

Ensure the patient is in a comfortable position, ideally sitting or standing. Clean and dry the genital area thoroughly. Trim or shave pubic hair around the urethra to ensure proper adhesion. Use gloves to maintain hygiene. Explain the process to reduce anxiety. Position the patient to allow easy access for catheter placement. Ensure the patient is relaxed to facilitate smooth application. This preparation step is essential for effective and comfortable use of the PureWick System.

Cleaning and Trimming Pubic Hair

Thoroughly clean the genital area using mild soap and warm water to remove dirt and oils. Pat dry with a clean towel. Trim pubic hair around the urethra to a short length (1/4 inch) using scissors or an electric trimmer. This step ensures proper adhesion of the catheter and reduces the risk of irritation. Avoid shaving completely, as it may cause skin irritation. Clean and dry the area again after trimming to ensure optimal conditions for the PureWick System.

Step-by-Step Instructions for Application

  1. Gather all supplies, including the PureWick catheter, collection container, and adhesive remover.
  2. Prepare the patient by cleaning and trimming pubic hair as instructed.
  3. Gently apply the external catheter, ensuring proper alignment with the urethra.
  4. Secure the device using the provided adhesive and straps.
  5. Connect the catheter to the collection container and activate suction.

Placing the External Catheter

Position the external catheter gently over the penis, ensuring proper alignment with the urethra. Carefully roll the catheter sheath downward, starting from the tip. Maintain a slight tension to avoid wrinkles. Guide the adhesive strip to secure the catheter in place, ensuring it adheres firmly to the skin. Avoid applying excessive pressure, which could cause discomfort or restrict blood flow. Double-check the catheter’s placement to ensure it is centered and evenly aligned for optimal function. Consult a healthcare provider if resistance or discomfort occurs during placement.

Securing the Device Properly

To ensure proper security, gently press the adhesive strips onto the skin, starting near the base of the penis. Smooth out any air bubbles to create a strong seal. Use the adjustable strap to snugly fasten the device, avoiding overtightening. Check the fit by gently tugging the catheter to confirm stability. Ensure the device is not twisted or bunched, as this could compromise adhesion or cause discomfort. Proper securing is essential for reliable performance and skin protection.

Activating the Suction

After securing the device, activate the suction by turning on the pump or opening the suction valve, depending on the system type. Gently press the catheter to ensure it is properly connected to the collection container. Check for a steady flow of urine to confirm suction is working. If using a battery-powered pump, ensure it is fully charged. Monitor the suction strength to avoid discomfort, and adjust as needed. Proper activation ensures efficient urine collection and system performance.

Maintenance and Monitoring

Regularly check the system for proper adhesion, ensure the collection container is emptied, and monitor skin integrity to prevent irritation or breakdown.

Checking for Proper Adhesion

Ensure the PureWick external catheter adheres securely to prevent leaks. Gently press the adhesive around the base to confirm it’s snug against the skin. Daily inspections are crucial to maintain a proper seal. If the adhesive loosens, reposition or replace it promptly. Proper adhesion protects the skin from irritation and ensures effective urine collection. Regular checks help prevent complications and maintain the system’s functionality. Address any issues immediately to avoid discomfort or device failure.

Emptying the Collection Container

To empty the collection container, first ensure the system is turned off. Wear gloves for hygiene and carefully detach the container from the PureWick device. Pour the urine into the toilet, avoiding splashing. Rinse the container with water if needed, then thoroughly clean it with mild soap. Allow it to air dry before reattaching to prevent bacteria growth. Always empty the container when it’s 1/3 to 1/2 full to maintain optimal function and hygiene. Regular emptying prevents overflow and odor buildup.

Monitoring Skin Integrity

Regularly inspect the skin around the PureWick catheter for signs of redness, irritation, or sores. Ensure the device fits properly to avoid pressure sores or skin breakdown. Clean the area daily with mild soap and water to maintain hygiene. If skin integrity deteriorates or shows signs of infection, seek medical attention promptly. Proper monitoring helps prevent complications and ensures long-term comfort and effectiveness of the system.

Troubleshooting Common Issues

  • Leaks: Check catheter placement and ensure proper adhesion.
  • Dislodgement: Secure the device firmly and verify fit.
  • Suction issues: Inspect tubing for blockages or kinks.

Addressing Leaks or Dislodgement

Leaks or dislodgement can occur due to improper placement or movement. Inspect the catheter for blockages or kinks. Ensure the external catheter is properly secured and aligned. Check the adhesive for proper adhesion and consider repositioning if needed. If leaks persist, consult a healthcare professional for sizing adjustments. Regularly cleaning the skin and ensuring a snug fit can prevent dislodgement. Proper maintenance and monitoring are key to avoiding these issues.

Resolving Suction Problems

Suction issues may arise if the tubing is kinked or blocked. Check the tubing for any bends or debris. Ensure the external catheter is properly aligned and not twisted. Activate suction slowly to avoid air bubbles. If suction fails, verify the collection container is securely connected. Regularly cleaning the catheter and tubing can prevent blockages. If problems persist, consult a healthcare professional for assistance or replacement parts. Proper suction is vital for effective urine collection.

Managing Skin Irritation

Skin irritation with the PureWick system is rare but can occur due to adhesive or prolonged use. Clean the area gently with mild soap and water before reapplying. Allow the skin to breathe for 30 minutes without the device. Apply a hypoallergenic barrier cream to sensitive areas, ensuring it’s compatible with the adhesive. Avoid harsh products that may exacerbate irritation. If redness or discomfort persists, consult a healthcare provider for further guidance. Proper skin care enhances comfort and system effectiveness.

Frequently Asked Questions

Common queries include insurance coverage, usage duration, and device maintenance. These topics are addressed to ensure optimal use and user satisfaction effectively.

Is the PureWick System Covered by Insurance?

The PureWick System is often covered by insurance, including Medicare and private plans, as a medical necessity for managing male urinary incontinence. Coverage specifics vary by provider, so verifying with your insurance company is essential. Typically, a prescription from a healthcare provider is required for reimbursement. This ensures access to the device for those who need it, making it a practical solution supported by insurance policies.

Can the PureWick Be Used for Extended Periods?

The PureWick System is designed for extended use, making it suitable for continuous urinary management. It is typically worn for up to 72 hours, depending on individual needs and skin tolerance. Proper maintenance, such as regular checks and hygiene practices, is essential to ensure comfort and effectiveness. Users should follow the manufacturer’s guidelines and consult a healthcare provider for personalized recommendations on long-term use.

How to Clean and Reuse the Device

Cleaning and reusing the PureWick device requires careful attention to maintain hygiene and functionality. Wash the external catheter with mild soap and lukewarm water, ensuring no residue remains. Rinse thoroughly and allow it to air dry to prevent bacterial growth. Avoid using harsh chemicals or abrasive materials, as they may damage the device. Always follow the manufacturer’s cleaning instructions and consult a healthcare provider for guidance on safe reuse practices.

Comparing PureWick to Other Catheter Types

PureWick offers a non-invasive, comfortable alternative to traditional catheters, providing ease of use and reducing the risk of infections without compromising on efficiency and discretion for males.

Advantages Over Traditional Catheters

The PureWick system offers a non-invasive, external catheter solution, reducing the risk of urinary tract infections and skin irritation common with internal catheters. Its adhesive-free design enhances comfort, while the suction mechanism ensures efficient urine collection without the need for bulky pads. Additionally, PureWick promotes independence, as it can be easily managed without assistance, and its discreet nature makes it ideal for daily use. This system also minimizes odour concerns, providing a hygienic and confidence-boosting alternative to traditional methods.

Differences from Incontinence Pads

The PureWick system differs significantly from incontinence pads by offering a more discreet and hygienic solution. Unlike pads, PureWick collects urine externally without requiring frequent changes, reducing bulk and odour concerns. It minimizes skin irritation from adhesive products and provides a more dignified alternative for men managing incontinence. PureWick also reduces the need for multiple pad changes, offering cost savings and environmental benefits over time. This system is designed for long-term comfort and efficiency.

Nurse and Caregiver Insights

Nurses and caregivers highlight the PureWick system’s ease of use and patient comfort, making it an effective solution for managing incontinence with dignity and efficiency.

Best Practices from Experienced Nurses

Experienced nurses emphasize proper preparation, ensuring the skin is clean and dry before application. They recommend regular checks for secure placement and proper suction settings to prevent leaks. Nurses also advise educating patients on correct usage and encouraging open communication for any discomfort or issues. Regular monitoring of skin integrity and timely emptying of the collection container are crucial for maintaining hygiene and preventing complications. Following these practices enhances patient comfort and system effectiveness.

Caregiver Tips for Effective Use

Caregivers should create a consistent routine for application and monitoring, ensuring the system is used as directed. Encourage open communication with the patient to address concerns promptly. Visual aids or checklists can help remind patients of key steps. Regularly inspect the device for proper fit and function, and maintain a clean environment to prevent infections. Providing emotional support and reassurance can significantly improve the patient’s experience and adherence to the system.

Patient Testimonials and Experiences

Male PureWick users report improved confidence and convenience, with many highlighting its discreetness and comfort. Testimonials often emphasize how it has enhanced their daily lives and independence.

Real-Life Success Stories

Many men have shared positive experiences with the PureWick system, highlighting its life-changing impact. One user reported a significant reduction in leaks, improving his confidence and sleep quality. Another shared how the system allowed him to travel without worrying about incontinence products. Patients with limited dexterity praised its ease of use, while others appreciated the discreetness, enabling them to maintain an active lifestyle. These stories underscore the system’s effectiveness and transformative potential for male urinary health management.

Common Feedback from Users

Users frequently praise the PureWick system for its convenience and comfort, noting it has significantly improved their quality of life. Many highlight its ease of use and discreetness, which boosts confidence in public settings. However, some users mention an initial adjustment period and occasional challenges with proper adhesion. Overall, the system is well-received for its effectiveness in managing urinary incontinence, though individual experiences may vary based on personal needs and preferences.

Future Innovations in Urinary Health Management

Future advancements may include self-cleaning catheters, adjustable suction control, and integration with smart devices for real-time monitoring, enhancing user convenience and efficiency.

Advancements in External Catheter Technology

Future advancements in external catheter technology may focus on antimicrobial materials, enhanced flexibility, and improved suction control. These innovations aim to reduce infections, increase comfort, and simplify use. Developers are also exploring adjustable fitting options to accommodate varying body types and activity levels. Additionally, integration with wearable health monitors could provide real-time feedback, improving overall urinary health management for users.

Potential Integration with Wearable Devices

The PureWick system may soon integrate with wearable devices, offering real-time monitoring of urine output and device performance. Sensors could track pressure, suction levels, and system integrity, sending alerts to users or caregivers via smartwatches or apps. This integration could enhance convenience, reduce complications, and improve long-term health management. Data collection could also aid in personalized care plans, making the PureWick system a smarter, more connected solution for urinary health.

surgical implant guide

Surgical implant guides are specialized tools designed to enhance precision in implant placement during surgeries. They ensure accurate positioning, reduce human error, and improve surgical outcomes for patients.

1.1 Definition and Purpose of Surgical Implant Guides

Surgical implant guides are specialized tools designed to assist surgeons in achieving precise placement of implants during surgical procedures. These guides are typically customized to fit the unique anatomy of each patient, ensuring accurate alignment and positioning of the implant. The primary purpose of these guides is to enhance surgical accuracy, reduce operation time, and improve patient outcomes. By providing a predefined pathway for implant placement, they minimize the risk of human error and complications. Surgical implant guides are commonly used in various fields, including dentistry, orthopedics, and neurosurgery. They are created using advanced imaging technologies, such as CT scans or MRI, to generate a detailed model of the patient’s anatomy. This allows surgeons to plan and execute procedures with greater confidence, ultimately leading to better recovery rates and long-term success of the implant.

1.2 Historical Development of Surgical Implant Guides

The concept of surgical implant guides dates back to the early 20th century when surgeons sought more precise methods for implant placement. Initially, these guides were simple, manually crafted tools based on preoperative planning and anatomical studies. The introduction of radiography in the early 1900s marked a turning point, enabling surgeons to visualize bone structures and plan implant placements more accurately. In the 1970s, computed tomography (CT) scans provided detailed cross-sectional images, further enhancing the design of surgical guides. The 1990s saw the rise of 3D printing, revolutionizing the creation of patient-specific implant guides. This technological evolution transformed surgical practices, shifting from generic, one-size-fits-all approaches to highly customized solutions. Over time, these advancements have significantly improved surgical precision and patient outcomes, making implant guides indispensable in modern surgery.

1.3 Importance of Surgical Implant Guides in Modern Surgery

Surgical implant guides have become a cornerstone in modern surgical practices due to their ability to enhance precision, reduce complications, and improve patient outcomes. These guides enable surgeons to achieve accurate implant placement, which is critical for the success of procedures like joint replacements, dental implants, and neurosurgical interventions. By minimizing human error, implant guides contribute to shorter operative times and faster recovery periods for patients. Additionally, they help in preserving surrounding tissues, reducing the risk of intraoperative complications. The use of these guides also enhances the predictability of surgical results, leading to higher patient satisfaction. Overall, surgical implant guides play a pivotal role in advancing surgical accuracy, efficiency, and safety, making them indispensable in contemporary medical practice. Their integration into surgical workflows has set a new standard for precision and effectiveness in implant-based surgeries.

Types of Surgical Implant Guides

Surgical implant guides vary based on material, surgical methodology, and customization. They include options like metal, plastic, and 3D-printed models, catering to different surgical needs and preferences.

2.1 Classification Based on Material

Surgical implant guides are categorized based on the materials used in their construction, which significantly influence their performance and suitability for specific procedures. Metal guides, such as those made from titanium or stainless steel, are durable and often used for permanent implants due to their high strength and resistance to wear. Plastic or polymer guides are more flexible and biocompatible, making them ideal for temporary or less invasive surgeries. 3D-printed guides, typically fabricated from biocompatible polymers or resins, offer customization and precision, catering to complex anatomical structures. Each material provides distinct advantages, ensuring that surgeons can select the most appropriate guide for their patients’ needs, balancing factors like accuracy, durability, and cost-effectiveness.

2.2 Classification Based on Surgical Methodology

Surgical implant guides are also classified based on the surgical methodology for which they are designed. Open surgery guides are used in traditional procedures where larger incisions are made, providing direct access to the implant site. Minimally invasive guides are designed for smaller incisions, reducing tissue damage and promoting faster recovery. Robotic-assisted guides are integrated with robotic systems, offering precision and control in complex surgeries. Additionally, guides can be categorized as custom or standard, depending on whether they are tailored to individual patient anatomy or used for routine procedures. This classification ensures that surgeons can choose guides that align with their surgical approach, enhancing procedural efficiency and patient outcomes. Each methodology-specific guide is optimized to address unique challenges, making them indispensable in modern surgical practices.

2.3 Custom vs. Standard Surgical Implant Guides

Surgical implant guides can be broadly categorized into custom and standard types. Custom guides are tailored to individual patient anatomy, created using advanced imaging and 3D printing technologies. They offer precise fit and alignment, reducing surgical complexity and improving outcomes. In contrast, standard guides are pre-manufactured for common anatomical sizes and procedures, providing a cost-effective solution for routine surgeries. Custom guides are typically used in complex cases, while standard guides suffice for straightforward implant placements. The choice depends on the patient’s specific needs, surgical complexity, and budget; Custom guides often require longer preparation times and higher costs, whereas standard guides are readily available but may not offer the same level of precision. This classification highlights the balance between personalization and practicality in surgical implant guide selection.

Design and Development of Surgical Implant Guides

The design and development of surgical implant guides involve advanced 3D imaging, precision engineering, and collaboration between surgeons and engineers. The process ensures accurate fit and alignment, prioritizing biocompatibility and durability. Modern technologies like 3D printing have revolutionized this field, enabling customized solutions that enhance surgical outcomes.

3.1 Traditional Methods of Creating Surgical Guides

Traditionally, surgical implant guides were created using manual modeling techniques and basic imaging tools. Surgeons relied on physical models, such as plaster or acrylic replicas, derived from patient CT scans. These models were painstakingly crafted by hand to mimic the patient’s anatomy, ensuring proper fit and alignment. The process was time-consuming and required significant skill, often involving multiple iterations to achieve accuracy. While effective, these methods lacked precision and scalability, making them less practical for complex cases. Additionally, the reliance on physical materials limited customization and adaptability. Despite these limitations, traditional techniques laid the foundation for modern advancements, emphasizing the importance of precise anatomical replication in surgical planning.

3.2 Modern Technologies in Surgical Guide Design

Modern technologies have revolutionized the design of surgical implant guides, enhancing precision and customization. Computer-aided design (CAD) software is widely used to create detailed digital models of patient anatomy, enabling accurate implant placement planning. 3D printing plays a pivotal role, allowing for the rapid production of guides tailored to individual patients. Reverse engineering techniques are also employed to develop guides from medical imaging data, such as CT or MRI scans. Additionally, virtual surgical planning (VSP) systems integrate advanced algorithms to simulate surgeries, optimizing guide design. These technologies ensure higher accuracy, reduced surgical time, and improved patient outcomes. The shift from manual methods to digital tools has streamlined the process, making surgical implant guides more accessible and effective. Modern advancements continue to push the boundaries, offering innovative solutions for complex surgical challenges.

3.3 Role of 3D Printing in Surgical Implant Guides

3D printing has emerged as a transformative technology in the creation of surgical implant guides, offering unparalleled customization and precision. By utilizing patient-specific data from CT or MRI scans, 3D printing enables the production of guides that perfectly match the anatomy of individual patients. This personalized approach enhances the accuracy of implant placement, reducing the risk of complications. The technology also allows for rapid prototyping, significantly shortening production time compared to traditional methods. Additionally, 3D printing facilitates the creation of complex geometries, such as drill guides and alignment markers, which are critical for precise surgical execution. The use of biocompatible materials ensures the guides are safe for direct contact with tissue. Furthermore, 3D printing has made it possible to produce sterilizable guides, expanding their applicability in surgical settings. Overall, this technology has revolutionized the field, making surgical implant guides more accessible, accurate, and patient-specific.

Clinical Applications of Surgical Implant Guides

Surgical implant guides are widely used in dental, orthopedic, and neurosurgical procedures, enhancing precision and outcomes by ensuring accurate implant placement and alignment.

4.1 Dental Implant Surgery

Surgical implant guides play a pivotal role in dental implant surgery, ensuring precise placement of implants for optimal functionality and aesthetics. These guides are typically custom-made using patient-specific data from CT scans or 3D models, allowing surgeons to predetermine the ideal position, angle, and depth for each implant. This reduces the risk of complications, such as nerve damage or improper alignment, and enhances the overall success of the procedure. The use of guides also minimizes invasive tissue displacement, leading to faster recovery times and improved patient comfort. Additionally, they facilitate accurate restoration of the patient’s bite and smile, making dental implant surgery more predictable and efficient. As a result, surgical implant guides have become an essential tool in modern dental implantology, offering both surgeons and patients a reliable solution for achieving desired outcomes.

  • Custom-made guides based on patient anatomy.
  • Precise implant placement for better aesthetic and functional results.
  • Reduced surgical complications and faster recovery.

4.2 Orthopedic Implant Surgery

Surgical implant guides are widely used in orthopedic implant surgery to enhance the accuracy of joint replacement procedures, such as knee, hip, and shoulder surgeries. These guides are designed to align prosthetic components with the patient’s anatomy, ensuring proper fit and minimizing the risk of complications like misalignment or dislocation. By using preoperative imaging data, such as CT or MRI scans, surgeons can create custom guides that match the patient’s specific bone structure. This approach reduces the need for invasive tissue dissection, leading to smaller incisions and faster recovery times. Additionally, surgical guides help in preserving soft tissue and bone, which is critical for maintaining joint stability and function. Their use has become increasingly popular in minimally invasive surgeries, offering improved outcomes and reduced operative time for orthopedic patients.

  • Custom guides based on patient anatomy for precise alignment.
  • Minimally invasive techniques for faster recovery.
  • Reduced risk of complications in joint replacement surgeries.

4.3 Neurosurgical and Other Specialized Applications

Surgical implant guides are increasingly utilized in neurosurgery and other specialized fields to address complex anatomical challenges. In neurosurgery, these guides are employed for precise placement of electrodes, deep brain stimulation devices, and cranial implants. They are particularly valuable in skull base surgeries, where accuracy is critical to avoid damage to sensitive structures. Additionally, in spinal surgery, guides help in accurately positioning pedicle screws and other hardware, reducing the risk of nerve injury. Beyond neurosurgery, surgical guides are used in maxillofacial reconstruction and cranial implants, ensuring proper alignment and fit of prosthetics. Advanced imaging technologies, such as MRI and CT scans, enable the creation of highly accurate models, improving outcomes in these high-risk procedures. These specialized applications highlight the versatility and critical role of surgical implant guides in modern medicine.

  • Precise electrode placement in neurosurgery.
  • Accurate hardware positioning in spinal procedures.
  • Custom solutions for cranial and maxillofacial reconstruction.

Benefits and Advantages of Surgical Implant Guides

Surgical implant guides enhance accuracy, reduce operation time, and minimize complications, leading to faster recovery and improved patient outcomes through personalized solutions.

  • Improved precision in implant placement.
  • Shorter surgical procedures.
  • Reduced risk of complications.

5.1 Improved Accuracy in Implant Placement

Surgical implant guides significantly enhance the precision of implant placement, ensuring optimal alignment and positioning.

  • Customized guides, created from patient-specific data, minimize human error during surgery.
  • Advanced imaging technologies, such as CT scans, enable precise preoperative planning.
  • Guides help surgeons achieve accurate angulation and depth, critical for implant stability and functionality.
  • Reduced deviation from preoperative plans leads to better surgical outcomes.
  • Enhanced accuracy lowers the risk of complications, such as nerve damage or improper fit.

This level of precision is particularly vital in complex procedures, where even minor misalignment can affect long-term results.

5.2 Reduced Surgical Time and Complexity

Surgical implant guides play a crucial role in simplifying procedures and reducing overall surgical time.

  • These guides provide predefined pathways for implant placement, minimizing the need for intraoperative adjustments.
  • By streamlining the surgical workflow, guides enable surgeons to focus on critical aspects of the procedure.
  • Preoperative planning integrated into the guide design reduces decision-making during surgery.
  • Standardized templates minimize variability, ensuring consistent outcomes across procedures.
  • Shorter operating times contribute to reduced anesthesia risks and faster patient recovery.

Overall, surgical implant guides make complex surgeries more efficient, benefiting both surgeons and patients.

5.3 Enhanced Patient Outcomes and Recovery

Surgical implant guides significantly contribute to improved patient outcomes by ensuring precise implant placement, which minimizes complications and promotes faster recovery.

  • Precision in implant positioning reduces the risk of nerve or tissue damage, leading to less postoperative pain.
  • Minimized trauma to surrounding tissues results in shorter healing times and reduced inflammation.
  • Accurate placement enhances the stability and longevity of implants, improving functional outcomes.
  • Patients often experience fewer complications, such as infections or implant failures, due to optimal placement.
  • Shorter recovery periods allow patients to resume daily activities sooner, improving their quality of life.

These factors collectively contribute to higher patient satisfaction and better long-term results in various surgical applications.

Challenges and Limitations of Surgical Implant Guides

Surgical implant guides face limitations, including material constraints, manufacturing complexities, high costs, accessibility issues, and the learning curve for surgeons to master their use effectively.

6.1 Technical Challenges in Guide Development

Developing surgical implant guides presents several technical challenges. One major issue is ensuring the precise alignment and fit of guides with patient anatomy, which requires highly accurate imaging and modeling. Another challenge is material selection, as guides must be biocompatible, durable, and sterilizable. Design complexity also arises from varying surgical needs and anatomical differences. Additionally, integrating advanced technologies like 3D printing and AI into guide development can be technically demanding. Manufacturing precision is critical to avoid errors that could lead to surgical complications. Finally, achieving compatibility with existing surgical tools and systems further complicates the process. Addressing these technical challenges is essential to optimize guide performance and reliability in clinical settings.

6.2 Cost and Accessibility Issues

The high cost of surgical implant guides is a significant barrier to their widespread adoption. Custom guides, particularly those designed using advanced technologies like 3D printing, are expensive to produce due to the complexity of design and materials. Additionally, the cost of specialized software and equipment required for guide development further increases the financial burden. Accessibility is another concern, as smaller clinics or hospitals in remote areas may lack the resources to invest in these technologies. Patients in low-income regions often face limited access to procedures utilizing implant guides, exacerbating healthcare disparities. Moreover, the cost of training surgeons and staff to use these guides effectively adds to the overall expense. These economic and logistical challenges hinder the broader implementation of surgical implant guides, particularly in underserved populations.

6.3 Human Error and Training Requirements

Despite their technological advancements, surgical implant guides are not immune to human error, which can impact their effectiveness. Surgeons must undergo specialized training to accurately interpret patient data and correctly use the guides during procedures. Misalignment or improper handling of the guides can lead to inaccurate implant placement, compromising surgical outcomes. Furthermore, the complexity of custom guides requires surgeons to have a deep understanding of both the technology and the patient’s anatomy; The learning curve for these tools can be steep, and inadequate training may result in errors. Additionally, the reliance on preoperative planning means that any mistakes in data interpretation or guide design can have cascading effects. Therefore, comprehensive training programs and adherence to strict protocols are essential to minimize human error and ensure the safe and effective use of surgical implant guides.

Future Trends and Innovations in Surgical Implant Guides

Integration of artificial intelligence for real-time adjustments and enhanced accuracy, development of advanced biocompatible materials improving longevity and patient compatibility, and global standardization efforts ensuring consistency and safety worldwide.

7.1 Integration of Artificial Intelligence

The integration of artificial intelligence (AI) into surgical implant guides is revolutionizing the field by enhancing precision and personalization. AI algorithms can analyze patient data, such as MRI and CT scans, to optimize implant placement. Machine learning models predict optimal implant positions, reducing human error and improving surgical outcomes. Real-time AI-driven systems enable dynamic adjustments during procedures, adapting to anatomical variations. Additionally, AI-powered robots assist surgeons, improving accuracy and flexibility. This technology also streamlines preoperative planning, reducing surgery time and complications. AI’s role in surgical implant guides is expected to grow, offering tailored solutions for complex cases and advancing minimally invasive techniques.

7.2 Development of Biocompatible Materials

The development of biocompatible materials is a critical advancement in surgical implant guides, ensuring compatibility with human tissue to prevent adverse reactions. Materials like titanium alloys, PEEK (polyetheretherketone), and bioresorbable polymers are widely used due to their durability and biocompatibility. Recent innovations focus on creating materials that promote osseointegration, enhancing implant stability and longevity. Bioactive coatings and surface modifications further improve tissue compatibility, reducing the risk of inflammation or rejection. Additionally, biocompatible materials enable the creation of custom guides that can be easily sterilized and used in various surgical environments. Their development not only improves patient safety but also supports the long-term success of implants. As research progresses, biocompatible materials are expected to play a pivotal role in advancing surgical implant guides, offering tailored solutions for diverse patient needs while maintaining high standards of safety and performance.

7.3 Global Adoption and Standardization

The global adoption of surgical implant guides is expanding rapidly, driven by their proven efficacy in improving surgical outcomes. Standardization efforts are critical to ensure consistency and safety across different regions. Regulatory bodies, such as the FDA and European regulatory agencies, play a key role in establishing guidelines for the design, manufacturing, and clinical use of these guides. Training programs for surgeons and medical staff are also being implemented worldwide to promote proper usage. However, challenges such as language barriers, varying healthcare systems, and regional preferences must be addressed to achieve uniform adoption. International collaboration and the development of universal standards are essential to overcome these hurdles. As standardization progresses, surgical implant guides are expected to become a cornerstone of modern surgery globally, ensuring equitable access to advanced surgical solutions and improving patient care worldwide.

Surgical implant guides have revolutionized modern surgery, enhancing accuracy, efficiency, and patient outcomes. Their evolution promises greater advancements, solidifying their role as indispensable tools in global healthcare.

8.1 Summary of Key Points

Surgical implant guides have emerged as transformative tools in modern surgery, offering enhanced precision, reduced operative time, and improved patient recovery. Their development has evolved significantly, from traditional methods to advanced technologies like 3D printing, enabling customization and adaptability. These guides are widely applied in dental, orthopedic, and neurosurgical procedures, demonstrating versatility and efficacy. Key benefits include improved implant placement accuracy, minimized complications, and faster recovery times. However, challenges such as high costs, technical complexity, and the need for specialized training persist. Despite these limitations, the integration of artificial intelligence and biocompatible materials promises further advancements. Surgical implant guides represent a cornerstone of modern surgical innovation, balancing practicality with cutting-edge technology to enhance outcomes across diverse medical fields.

8.2 Recommendations for Future Research

Future research on surgical implant guides should focus on improving material biocompatibility, reducing costs, and enhancing customization. Investigating advanced manufacturing techniques, such as scalable 3D printing, could make guides more accessible. Additionally, exploring AI-driven design tools to optimize guide precision and adaptability is crucial. Studies on long-term clinical outcomes and comparative effectiveness across surgical specialties would provide valuable insights. Addressing the learning curve for surgeons through innovative training programs and real-time feedback systems could also improve adoption. Finally, developing universal design standards and interoperability with existing surgical systems would promote global consistency and safety. These areas of research hold the potential to further revolutionize surgical practices and patient care.

8.3 Final Remarks on the Evolution of Surgical Implant Guides

The evolution of surgical implant guides reflects a remarkable transformation in surgical practices, driven by technological advancements and the pursuit of precision. From traditional methods to modern, patient-specific solutions, these guides have become indispensable in enhancing surgical accuracy and outcomes. The integration of 3D printing, AI, and biocompatible materials has set the stage for continued innovation. As these tools become more accessible and refined, their impact on healthcare will expand, offering safer, more efficient procedures. The future holds promise for even greater advancements, potentially integrating real-time data and adaptive technologies. Surgical implant guides embody the synergy of medicine and technology, paving the way for a new era of surgical excellence and improved patient care.