Manuals

mobi thermometer manual

Mobi Thermometer Manual⁚ A Comprehensive Guide

This comprehensive guide will walk you through everything you need to know about your Mobi thermometer, from its features and usage to troubleshooting and maintenance. Whether you’re using it to take forehead, ear, or object temperatures, this manual will equip you with the knowledge to get the most out of your device.

Introduction

Welcome to the world of Mobi thermometers! These innovative devices are designed to make taking temperatures quick, easy, and accurate, offering a range of features to suit your needs. Whether you’re a parent concerned about your child’s health, a busy professional looking for a convenient way to monitor your temperature, or simply someone who values accurate and reliable measurements, Mobi thermometers have you covered. This manual will guide you through the features, functionality, and care of your Mobi thermometer, ensuring you can confidently use it for all your temperature-related needs.

From the basics of taking a temperature to troubleshooting common issues, this manual is your one-stop resource for all things Mobi thermometers. We’ll cover everything from the simple steps of turning your thermometer on and off to the intricacies of using its various modes. So, let’s dive in and unlock the potential of your Mobi thermometer together!

Product Overview

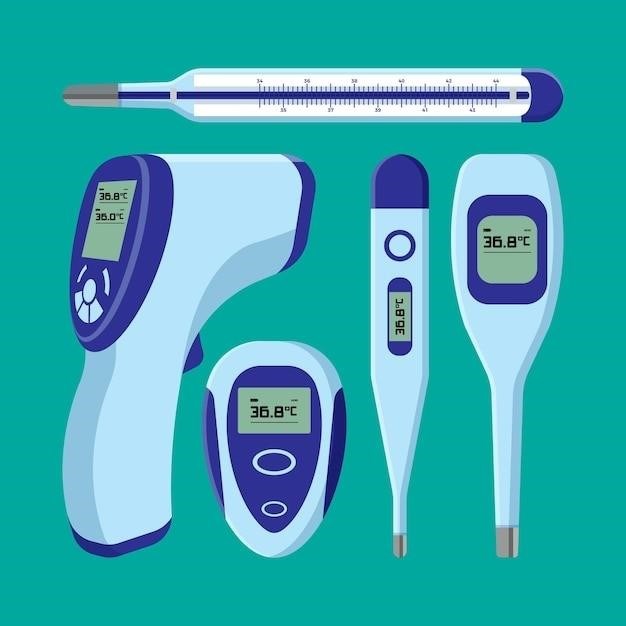
Mobi thermometers are a range of innovative and user-friendly devices designed to provide accurate and reliable temperature readings. These thermometers leverage cutting-edge infrared technology to measure body temperature quickly and efficiently, without the need for direct contact. Mobi thermometers are available in various models, catering to different needs and preferences.

Some models offer dual functionality, enabling you to measure temperatures from both the forehead and the ear, while others specialize in non-contact readings, ideal for taking temperatures without disturbing your subject. Many Mobi thermometers also feature additional functions like object temperature measurement, allowing you to check the temperature of food, baby bottles, or bathwater, all within the same device.

Mobi thermometers are designed with user-friendliness and safety in mind. They feature intuitive controls, easy-to-read displays, and are often equipped with memory functions that store past readings for easy reference. Whether you’re a tech-savvy individual or someone new to using thermometers, Mobi models are designed to be accessible and reliable.

Key Features

Mobi thermometers boast a range of features designed to make temperature measurement accurate, convenient, and user-friendly. These features vary depending on the specific model, but many Mobi thermometers share common functionalities. A key feature is the use of advanced infrared technology. This enables quick and accurate temperature readings without the need for direct contact, making it ideal for sensitive situations and minimizing the spread of germs.

Many Mobi thermometers offer dual functionality, allowing you to take both forehead and ear temperatures using the same device. This versatility makes them suitable for various age groups and situations. Some models also include object temperature measurement, enabling you to check the temperature of items like food, baby bottles, or bathwater.

Another key feature is the user-friendly design. Mobi thermometers typically feature intuitive controls, easy-to-read displays, and often include memory functions that store past readings for easy reference. Many models also incorporate features like fever alerts, color-coded displays, and backlit screens for enhanced visibility. These features contribute to a seamless and comfortable user experience.

Using the Thermometer

Using a Mobi thermometer is generally straightforward and intuitive. The specific steps may vary slightly depending on the model, but the basic principles remain consistent. Begin by turning on the device, which is often accomplished by pressing a dedicated button. Many Mobi thermometers offer the option to select between Celsius and Fahrenheit temperature scales, allowing you to choose your preferred unit of measurement.

The thermometer will likely have different modes for taking forehead, ear, and object temperatures. Ensure you select the appropriate mode before proceeding with the measurement. When taking forehead or ear temperatures, it’s crucial to follow the instructions in the manual regarding the distance and positioning of the thermometer to ensure accurate results.

For object temperature readings, the thermometer will often have a dedicated mode for this purpose. Refer to the manual for specific instructions on how to position the thermometer for accurate readings of food, bottles, or other objects. Once you have completed the measurement, the thermometer will display the temperature reading on its screen, often accompanied by a beep sound to indicate completion.

Taking Forehead Temperature

Taking a forehead temperature with a Mobi thermometer is a quick and convenient method for gauging body temperature. Ensure the thermometer is in the correct mode for forehead temperature readings, which is usually indicated by a specific icon or symbol on the device. Before taking the measurement, ensure the forehead is clear of any hair, sweat, or other obstructions that might interfere with accurate readings.

Position the thermometer approximately 1-2 inches away from the forehead, aiming the sensor at the center of the forehead. Most Mobi thermometers will have a trigger or button that you need to press and release to initiate the measurement. The device will then emit a beep sound to signal that the reading is complete.

The temperature reading will be displayed on the screen, allowing you to quickly assess the individual’s temperature. Remember that the accuracy of forehead temperature readings can be influenced by factors such as ambient temperature and the presence of sweat or hair.

Taking Ear Temperature

Taking an ear temperature with a Mobi thermometer offers a more precise measurement compared to forehead readings, as it measures the temperature directly inside the ear canal. Ensure that the thermometer is in the correct mode for ear temperature readings, often indicated by a specific icon or symbol on the device.

Before taking the measurement, gently pull the earlobe back and up for adults, or back and down for children, to straighten the ear canal. This helps ensure the probe makes proper contact with the eardrum. Insert the probe tip gently into the ear canal, ensuring that the probe is facing the eardrum.

Most Mobi thermometers will emit a beep sound when the measurement is complete, and the temperature reading will be displayed on the screen. For accurate readings, ensure that the ear canal is clean and free of wax buildup, as this can affect the accuracy of the measurement.

Measuring Object Temperature

Your Mobi thermometer can be used for more than just body temperature. It can also be utilized to measure the temperature of objects like baby bottles, food, bathwater, and even room temperature. This feature is convenient for ensuring the safety and comfort of your little ones.

To measure object temperature, switch the thermometer to the appropriate mode. This is usually indicated by a specific icon or symbol on the device. Some Mobi thermometers may require you to select the “Object” or “Surface” mode. Hold the thermometer probe a few inches away from the object, ensuring that the measurement sensor is pointed directly at the surface you want to measure.

Press the appropriate button on your Mobi thermometer, and the temperature will be displayed on the screen once the reading is complete. It’s important to note that the accuracy of object temperature measurements may vary depending on the distance between the probe and the object, as well as the type of object being measured.

Troubleshooting

While Mobi thermometers are designed to be reliable and user-friendly, occasional issues may arise. If you encounter any problems, refer to this troubleshooting guide before contacting customer support.

One common issue is inaccurate temperature readings. This can occur due to factors like a dirty sensor, incorrect placement of the thermometer, or interference from external sources like air conditioners or heating devices. Ensure the thermometer is properly cleaned and the sensor is positioned correctly for accurate results.

Another concern might be the battery life. If the thermometer is not powering on or the battery icon is flashing, replace the batteries with new ones. Remember to always use fresh batteries and avoid mixing old and new batteries.

If you’re experiencing difficulties with the thermometer’s settings, refer to the user manual for specific instructions on adjusting the time, temperature units, or other settings. You can also visit the Mobi website for help guides and FAQs.

Battery Information

Your Mobi thermometer relies on batteries to function, so it’s crucial to understand their importance and proper usage. The type of batteries required will vary depending on the specific model, so always refer to the user manual for accurate information.

Generally, Mobi thermometers use standard AA or AAA batteries. Ensure you use high-quality batteries to ensure optimal performance and longevity. Avoid using rechargeable batteries, as they may not provide sufficient power for the thermometer.

To replace the batteries, carefully open the battery compartment and insert the new batteries, ensuring they are placed correctly with the positive (+) and negative (-) terminals aligned with the markings inside the compartment. Close the compartment securely.

When the battery icon on the thermometer’s display begins flashing or the device shows signs of low power, replace the batteries immediately. Proper battery management will ensure your thermometer functions correctly and provides accurate readings.

Cleaning and Maintenance

Regular cleaning and proper maintenance are essential to ensure your Mobi thermometer remains accurate and hygienic. To clean the thermometer, use a soft, damp cloth with a mild disinfectant solution. Avoid using harsh chemicals or abrasive cleaners as they can damage the device.

For the ear probe, use a cotton swab dipped in rubbing alcohol to gently clean the tip. Ensure the probe is completely dry before using it again. Always consult the user manual for specific cleaning instructions for your model.

After each use, it’s recommended to store the thermometer in a clean, dry place, away from direct sunlight and extreme temperatures. Avoid dropping or exposing the device to moisture or liquids.

Regular cleaning and proper storage will help prolong the life of your Mobi thermometer and ensure its accuracy and safety for years to come.

Warranty and Support

Mobi Technologies offers a limited warranty on their thermometers, covering defects in materials and workmanship for a specified period. The exact warranty terms and conditions can be found in the user manual or on the Mobi website.

To access warranty support, contact Mobi Technologies directly through their website or customer service line. You may need to provide proof of purchase, such as a receipt or order confirmation.

Mobi also offers technical support for their thermometers. If you encounter any issues or have questions about using your device, visit the Mobi website or contact their customer service team for assistance.

By utilizing the warranty and support resources available, you can ensure that your Mobi thermometer remains functional and reliable for the duration of its lifespan.

FAQs

Here are some frequently asked questions about Mobi thermometers⁚

  • What is the accuracy of Mobi thermometers? Mobi thermometers are designed to provide accurate temperature readings, with varying levels of precision depending on the specific model. Refer to the user manual for details on the accuracy range of your particular thermometer.
  • How do I clean and disinfect my Mobi thermometer? Consult the user manual for specific cleaning instructions for your model. Generally, you can clean the thermometer with a damp cloth and mild soap. Avoid using harsh chemicals or abrasive materials.
  • Can I use the Mobi thermometer on a baby or infant? Some Mobi thermometer models are specifically designed for use on infants and young children. Always refer to the user manual for age recommendations and appropriate usage instructions.
  • How long do the batteries last in a Mobi thermometer? Battery life varies depending on the model and usage frequency. Refer to the user manual for battery life estimates and information on replacing batteries.
  • What are the different temperature units available on Mobi thermometers? Most Mobi thermometers offer both Fahrenheit (°F) and Celsius (°C) temperature units. You can select your preferred unit setting within the thermometer’s menu.

If you have any additional questions that aren’t addressed here, refer to the user manual or contact Mobi customer support for further assistance.

relationship users manual

Relationship Users Manual⁚ A Guide to Building Stronger Bonds

A relationship user manual is a personalized guide that helps you and your partner (or friends, family members, etc.) understand each others needs, preferences, and boundaries. It serves as a roadmap to better communication, reduced misunderstandings, and stronger emotional bonds.

Understanding the Concept

Imagine a world where misunderstandings are minimized, communication flows effortlessly, and emotional connections run deep. This is the promise of a relationship user manual, a personalized guide designed to foster stronger bonds between individuals; It’s not about dictating terms or controlling your partner; rather, it’s about creating a shared understanding of each other’s needs, preferences, and boundaries, paving the way for a more fulfilling and harmonious relationship. Think of it as a collaborative roadmap, outlining the unique terrain of your emotional landscape, helping you navigate its intricacies with greater awareness and empathy.

At its core, a relationship user manual is a document that captures the essence of who you are, how you operate in relationships, and what you seek from them. It’s a space for open and honest self-reflection, allowing you to articulate your values, desires, and boundaries in a way that is both clear and relatable to your partner. This transparency fosters mutual respect, reduces the potential for hurt feelings, and promotes a sense of shared responsibility for the relationship’s well-being.

While the concept might seem unusual at first, the idea of having a “manual” for your relationship is not that far-fetched. We often have user manuals for our electronic devices, providing instructions on how to use them effectively. Why not apply the same principle to the most important relationships in our lives?

The Importance of Communication

Communication is the lifeblood of any relationship, and within the framework of a relationship user manual, it takes on an even more crucial role. It’s not just about exchanging words; it’s about creating a safe and open space for expressing thoughts, feelings, and needs in a way that is both authentic and respectful. It’s about listening with empathy, understanding the nuances of your partner’s perspective, and responding with compassion.

A relationship user manual encourages a shift from assumptions to active dialogue. Instead of assuming your partner understands your needs, you explicitly articulate them, ensuring clarity and reducing the potential for misinterpretations. This proactive approach fosters a sense of shared responsibility for communication, where both individuals are actively involved in creating a mutual understanding.

The manual serves as a guide for navigating difficult conversations, providing a shared framework for addressing conflicts, expressing needs, and setting boundaries. It allows you to approach these conversations with a sense of preparedness, knowing that you have a clear understanding of your own values and how to communicate them effectively. By fostering open and honest communication, the user manual strengthens the foundation of trust and intimacy, paving the way for a deeper and more meaningful connection.

Setting Healthy Boundaries

Healthy boundaries are the invisible lines that define your personal space and protect your well-being within a relationship. They are not about creating walls or distancing yourself, but rather about establishing clear limits on what you are comfortable with and what you are not. They are essential for maintaining your autonomy, preserving your mental and emotional health, and fostering a relationship built on respect and mutual understanding.

A relationship user manual emphasizes the importance of actively defining and communicating your boundaries. It encourages you to reflect on your needs, values, and limits, and to express them clearly and assertively to your partner. The manual also provides a framework for discussing boundaries collaboratively, ensuring both individuals feel heard and respected. It encourages open communication, active listening, and a willingness to compromise when necessary.

Setting healthy boundaries is an ongoing process that requires both self-awareness and sensitivity towards your partner’s needs. It’s about finding a balance between honoring your own needs and respecting the needs of the other person. By creating a clear understanding of boundaries, the user manual fosters a more harmonious relationship, minimizing misunderstandings, reducing conflict, and promoting a sense of security and safety for both partners.

Navigating Conflict

Conflict is an inevitable part of any relationship. It arises from differing opinions, perspectives, and needs. The key is not to avoid conflict entirely, but rather to learn how to navigate it constructively. A relationship user manual provides a framework for approaching conflict in a way that fosters understanding, respect, and resolution.

The manual encourages open and honest communication as the foundation for navigating conflict. It emphasizes the importance of active listening, where both partners strive to understand each other’s perspectives without judgment or defensiveness. It also encourages the use of “I” statements to express personal feelings and needs, rather than blaming or attacking the other person.

The user manual promotes a collaborative approach to conflict resolution, where both partners work together to find mutually acceptable solutions. It discourages power struggles and emphasizes compromise and finding common ground. By providing a structured approach to navigating conflict, the user manual helps couples build resilience and strengthen their bond through challenging times.

Expressing Needs and Preferences

Open and honest communication is the cornerstone of a healthy relationship, and a relationship user manual emphasizes the importance of expressing needs and preferences clearly and respectfully. It encourages partners to create a safe space where they can share their desires, expectations, and vulnerabilities without fear of judgment or rejection.

The manual suggests using “I” statements to articulate needs and preferences. For example, instead of saying “You never listen to me,” a partner might say “I feel unheard when I try to share my thoughts and feelings.” This approach helps to avoid blame and promotes a sense of understanding and empathy. It also encourages partners to actively listen and respond to each other’s needs with empathy and understanding.

The user manual recognizes that needs and preferences can change over time, and it encourages regular communication to ensure that both partners are aware of each other’s evolving desires. It also emphasizes the importance of compromise and finding ways to meet each other’s needs without sacrificing personal values or boundaries.

Managing Expectations

A relationship user manual recognizes that expectations can be a source of tension and conflict if left unaddressed. It emphasizes the importance of setting realistic expectations and communicating them clearly to your partner. This involves understanding each other’s values, priorities, and life goals, as well as acknowledging that no two people will have identical expectations for a relationship.

The manual encourages partners to discuss their expectations in a non-judgmental and open manner. It suggests asking questions like “What do you need from me in this relationship?” and “What are your hopes and dreams for our future together?” This allows for greater transparency and understanding, minimizing the potential for disappointment or resentment.

Furthermore, the user manual emphasizes the importance of flexibility and willingness to adapt. It recognizes that life can be unpredictable and that both partners may need to adjust their expectations over time. It encourages open communication and a willingness to compromise to navigate these changes together.

The Role of Forgiveness

A relationship user manual acknowledges that forgiveness is an essential component of a healthy and enduring bond. It recognizes that mistakes and hurt are inevitable in any relationship, and that holding onto anger and resentment can be detrimental to both individuals. It encourages partners to prioritize understanding, empathy, and the ability to forgive each other’s shortcomings.

Forgiveness is not about condoning harmful behavior or minimizing the impact of hurtful actions. It is about letting go of the bitterness and resentment that can poison a relationship. The manual emphasizes that forgiveness is a choice, a conscious decision to release negative emotions and move forward. It acknowledges that forgiveness may not be easy, especially when dealing with significant hurt, but it emphasizes the importance of seeking resolution and healing for the sake of the relationship.

The manual highlights the benefits of forgiveness, including improved communication, increased trust, and a stronger sense of connection. It also emphasizes that forgiveness is not just about the other person; it is also about releasing yourself from the burden of negativity and allowing yourself to move forward. It suggests seeking professional help if forgiveness proves to be a difficult challenge, recognizing that a therapist can provide support and guidance in navigating this complex process.

Celebrating Differences

A relationship user manual emphasizes the importance of celebrating differences as a cornerstone of a strong and fulfilling connection. It recognizes that each individual brings unique qualities, perspectives, and experiences to a relationship, and that these differences can be a source of growth, enrichment, and mutual learning. Rather than viewing differences as points of conflict or incompatibility, the manual encourages partners to embrace their unique identities and appreciate the value that each person brings to the relationship.

The manual suggests creating a space where both partners feel comfortable expressing their individuality and sharing their perspectives, even when they differ. It promotes open communication, active listening, and a willingness to understand and appreciate each other’s viewpoints, even if they don’t always align. It encourages partners to engage in activities and interests that celebrate their individual passions and talents, recognizing that a relationship can flourish when each person feels valued and supported in pursuing their personal growth.

The manual highlights the importance of respecting each other’s boundaries and preferences, even when they differ from one’s own. It encourages partners to create a space where both individuals can thrive and express their individuality without feeling pressured to conform or compromise their true selves. The manual emphasizes that embracing differences strengthens a relationship, fostering a sense of mutual respect, admiration, and appreciation for the unique qualities that each partner brings to the bond.

The Power of Gratitude

The relationship user manual recognizes the profound impact of gratitude on the health and longevity of a relationship. It emphasizes that cultivating a mindset of appreciation for one’s partner, both big and small, can significantly enhance the quality of the connection. Gratitude fosters a sense of positivity and appreciation, nurturing a more loving and supportive environment.

The manual suggests incorporating practices of expressing gratitude into daily routines. This could include verbal expressions of appreciation, thoughtful gestures, or simply taking a moment to reflect on the positive qualities and contributions of one’s partner. It encourages couples to actively seek out and acknowledge moments of joy, kindness, and support, reinforcing the positive aspects of their relationship.

Gratitude helps shift the focus from what is lacking to what is present, fostering a more optimistic and fulfilling outlook. It promotes a sense of contentment, reducing the likelihood of taking one another for granted. By cultivating gratitude, the relationship user manual emphasizes the importance of nurturing appreciation for the unique bond shared between two individuals, strengthening the foundation of love, respect, and mutual support.

Maintaining Intimacy

The relationship user manual recognizes that intimacy is a multifaceted aspect of a relationship, encompassing emotional, physical, and intellectual connections. It acknowledges that intimacy can evolve and change over time and emphasizes the importance of nurturing and maintaining this vital element. The manual encourages couples to prioritize regular quality time together, dedicating focused attention to strengthening their bond.

This may involve engaging in shared activities, engaging in meaningful conversations, or simply enjoying each other’s presence. The manual also highlights the significance of physical intimacy as a vital expression of love and affection, encouraging couples to prioritize physical touch, affection, and sexual connection. It acknowledges that intimacy can be influenced by factors such as stress, work demands, or life changes, and encourages open communication and compromise to address any challenges.

The manual emphasizes that maintaining intimacy requires ongoing effort and intentionality. It suggests that couples explore new ways to connect, try new activities together, and remain open to discovering shared interests and passions. By prioritizing intimacy, the relationship user manual underscores the importance of fostering a sense of closeness, connection, and mutual understanding that enriches the overall relationship.

Growth and Evolution

The relationship user manual recognizes that relationships are dynamic and ever-evolving entities, undergoing transformations as individuals grow and change. It acknowledges that growth is an essential aspect of a healthy relationship, encouraging couples to embrace personal and collective development. The manual encourages individuals to pursue personal goals, interests, and hobbies, recognizing that personal growth enriches the relationship by introducing new perspectives and experiences.

It also emphasizes the importance of mutual support for personal growth, encouraging couples to celebrate each other’s achievements, offer encouragement during challenges, and provide a safe space for personal exploration. The manual acknowledges that growth can lead to changes in individual needs and desires, emphasizing the importance of open communication and adaptation to ensure the relationship evolves in a way that meets the needs of both partners. It encourages couples to regularly assess their relationship, discussing goals, expectations, and areas for improvement to ensure they are on the same page.

The relationship user manual recognizes that growth may involve challenges, such as navigating changes in roles, responsibilities, or life stages. It encourages couples to approach these challenges with empathy, understanding, and a willingness to adapt and compromise. By embracing growth and evolution, the relationship user manual promotes a sense of vitality, resilience, and shared purpose in the relationship, fostering a strong foundation for long-term connection and fulfillment.

The Benefits of a Relationship Users Manual

The benefits of a relationship user manual are numerous and contribute significantly to fostering stronger, healthier, and more fulfilling relationships. The manual provides a framework for clear and consistent communication, minimizing misunderstandings and fostering a sense of mutual understanding. By outlining individual needs, preferences, and boundaries, it creates a shared language for navigating complex emotions and situations, reducing conflict and resentment.

The manual encourages couples to prioritize their relationship, consciously allocating time for quality interactions, expressing appreciation, and engaging in activities that foster connection. It promotes a proactive approach to relationship maintenance, encouraging couples to address issues early on, preventing them from escalating into major conflicts. By creating a shared understanding of expectations, goals, and values, the manual fosters a sense of alignment and shared purpose, enhancing the overall satisfaction and stability of the relationship.

The relationship user manual empowers couples to navigate challenges with greater clarity, compassion, and resilience. It provides a roadmap for resolving conflicts constructively, fostering a sense of security and stability within the relationship. By promoting self-awareness, emotional intelligence, and effective communication, the manual equips couples with the tools to build a strong and lasting bond, creating a foundation for a truly fulfilling and rewarding partnership.

xl power pressure cooker manual

Power Pressure Cooker XL Manual⁚ A Comprehensive Guide

Welcome to the comprehensive guide for your Power Pressure Cooker XL! This manual will provide you with all the information you need to safely and effectively operate your new appliance. From understanding the control panel to mastering pressure cooking techniques, we’ve got you covered. Get ready to unlock a world of delicious and convenient cooking with your Power Pressure Cooker XL.

Introduction

The Power Pressure Cooker XL is a revolutionary kitchen appliance that simplifies cooking and unlocks a world of culinary possibilities. It utilizes the power of pressure cooking, a method that speeds up cooking times while preserving flavors and nutrients. This appliance is designed to be user-friendly and versatile, allowing you to prepare a wide range of dishes, from hearty stews and flavorful soups to tender meats and fluffy rice. Whether you’re a seasoned chef or a cooking novice, the Power Pressure Cooker XL is your perfect companion for creating delicious meals with ease.

This manual is your comprehensive guide to understanding and using your Power Pressure Cooker XL effectively. It provides step-by-step instructions on assembly, operation, cleaning, and troubleshooting. You’ll also find helpful tips and tricks to enhance your cooking experience and maximize the potential of your appliance.

Get ready to embrace the convenience and efficiency of pressure cooking. With your Power Pressure Cooker XL, you’ll discover a new level of culinary confidence and enjoy delicious homemade meals in a fraction of the time.

Safety Precautions

Your safety is our priority. Before using your Power Pressure Cooker XL, please read and understand the following safety precautions carefully. Adhering to these guidelines will ensure a safe and enjoyable cooking experience.

Never operate the Power Pressure Cooker XL without the lid securely in place. The lid is designed to create a sealed environment for pressure cooking, and removing it during operation could result in steam burns or other injuries.

Always use the Power Pressure Cooker XL on a stable, heat-resistant surface. Avoid placing it near combustible materials or on a surface that may be prone to tipping.

Never fill the inner pot beyond the maximum fill line. Overfilling the pot can cause excessive pressure build-up, leading to potential hazards.

Always use caution when handling the hot inner pot, lid, and steam vent. Use oven mitts or pot holders to protect your hands from burns.

Do not attempt to open the Power Pressure Cooker XL while pressure is still present. Allow the pressure to release naturally before attempting to open the lid.

Keep children and pets away from the Power Pressure Cooker XL while it is in operation. Supervise children closely in the kitchen and ensure they understand the dangers of hot appliances.

Never immerse the Power Pressure Cooker XL, its cord, or its plug in water or any other liquid. This could result in electrical shock or damage to the appliance.

Always unplug the Power Pressure Cooker XL from the electrical outlet when not in use.

Regularly inspect the Power Pressure Cooker XL for any signs of damage or wear. If you notice any damage, discontinue use immediately and contact the manufacturer.

Getting Started⁚ Assembly and Preparation

Before embarking on your culinary adventures with the Power Pressure Cooker XL, take a few moments to familiarize yourself with the assembly process and prepare your appliance for use. These simple steps will ensure a smooth and enjoyable cooking experience.

Unpack the Power Pressure Cooker XL and its components. Carefully remove all packaging materials and ensure that all parts are present. You should have the main unit, the inner pot, the lid, the steam vent, the pressure valve, and the power cord.

Wash the inner pot, lid, and rubber gasket with warm soapy water. Rinse thoroughly and dry completely. This initial cleaning step will remove any manufacturing residue and prepare your appliance for its first use.

Place the inner pot into the main unit. Ensure that it sits securely on the bottom of the appliance.

Attach the lid to the main unit, making sure that the steam vent is properly aligned and the pressure valve is in the closed position. You will hear a click sound when the lid is properly secured.

Plug the Power Pressure Cooker XL into a standard electrical outlet. Make sure that the outlet is grounded and can handle the appliance’s wattage.

Familiarize yourself with the control panel and its functions. Refer to the “Understanding the Control Panel” section of this manual for a detailed explanation of each button and setting.

Now that your Power Pressure Cooker XL is assembled and ready to go, you can begin exploring its remarkable capabilities and unlocking a world of culinary possibilities!

Understanding the Control Panel

The Power Pressure Cooker XL’s control panel is your command center for culinary creativity. It features a user-friendly interface with clear buttons and a digital display, making it easy to navigate and select your desired cooking settings. Here’s a breakdown of the key elements⁚

Power Button⁚ This button activates the Power Pressure Cooker XL, bringing it to life and preparing it for cooking.

Menu Button⁚ This button allows you to navigate through the various cooking functions available on your Power Pressure Cooker XL. You can choose from options like “Pressure Cook,” “Slow Cook,” “Sauté,” “Steam,” and more.

Cook Time Selector⁚ This dial allows you to set the desired cooking time for your chosen recipe. You can adjust the time in minutes, depending on the dish you’re preparing.

Pressure Level Selector⁚ Some Power Pressure Cooker XL models have a pressure level selector that allows you to choose between high and low pressure settings. This gives you greater control over your cooking process and can be helpful for certain recipes.

Keep Warm/Cancel Button⁚ This button allows you to keep your cooked food warm after it’s finished or to cancel the current cooking cycle.

Digital Display⁚ The digital display shows you the current cooking time, pressure level, and function selected. It also provides helpful messages and indicators during the cooking process.
By understanding the functions of each control panel element, you’ll be able to use your Power Pressure Cooker XL with confidence and precision, creating delicious meals with ease.

Cooking with the Power Pressure Cooker XL

The Power Pressure Cooker XL opens up a world of culinary possibilities, allowing you to create delicious and nutritious meals with speed and ease. Here’s a guide to help you get started with pressure cooking using your Power Pressure Cooker XL⁚

Choose your recipe⁚ Explore the vast array of recipes available for pressure cookers, or adapt your favorite dishes to this versatile appliance.

Prepare your ingredients⁚ Wash, chop, and measure your ingredients according to your chosen recipe.

Add ingredients to the inner pot⁚ Place your ingredients in the inner pot, ensuring they are evenly distributed.

Secure the lid⁚ Make sure the lid is securely locked onto the Power Pressure Cooker XL.

Select the cooking function⁚ Use the control panel to choose the appropriate cooking function for your recipe, such as “Pressure Cook,” “Slow Cook,” or “Sauté.”

Set the cooking time⁚ Using the cook time selector, set the appropriate cooking time based on your recipe instructions.

Press the “Start” button⁚ Once you’ve selected the function and set the cooking time, press the “Start” button to begin the cooking process.

Monitor the cooking process⁚ Keep an eye on the digital display to track the cooking time and pressure level.

Release pressure⁚ When the cooking cycle is complete, the Power Pressure Cooker XL will automatically release the pressure. You can also manually release the pressure by pressing the “Keep Warm/Cancel” button and rotating the pressure valve to the open position.

Serve and enjoy⁚ Once the pressure is released, you can safely open the lid and serve your delicious meal.

Pressure Cooking Basics

Pressure cooking is a method that utilizes the power of steam to cook food faster and more efficiently than traditional methods. Here’s a breakdown of the fundamentals of pressure cooking with your Power Pressure Cooker XL⁚

Sealed Environment⁚ The Power Pressure Cooker XL creates a sealed environment, trapping steam inside the pot. This trapped steam builds up pressure, raising the boiling point of water and accelerating the cooking process.

Rapid Cooking⁚ The increased pressure and temperature allow food to cook significantly faster than conventional methods, often reducing cooking times by up to 70%.

Nutrient Retention⁚ Pressure cooking can help retain nutrients in food, as the shorter cooking times minimize the loss of vitamins and minerals.

Flavor Enhancement⁚ The sealed environment helps trap flavors and moisture, resulting in more flavorful and tender dishes.

Versatility⁚ The Power Pressure Cooker XL is not limited to pressure cooking. It can also be used for other functions like slow cooking, sautéing, and steaming.

Safety First⁚ Always follow the safety guidelines outlined in your Power Pressure Cooker XL manual to ensure safe and effective operation.

Experiment and Explore⁚ Pressure cooking opens up a world of culinary possibilities. Experiment with different recipes and techniques to discover new favorites.

Choosing the Right Cooking Time

Selecting the appropriate cooking time is crucial for achieving perfectly cooked meals. The Power Pressure Cooker XL offers a range of pre-set cooking times for various ingredients and dishes. However, it’s essential to understand the factors that influence cooking time for optimal results⁚

Ingredient Type⁚ Different ingredients require varying cooking times. For instance, vegetables cook faster than tougher meats.

Quantity⁚ The amount of food you’re cooking can affect the cooking time. Larger quantities may require slightly longer cooking times.

Desired Texture⁚ Your preferred texture for the final dish plays a role in choosing the appropriate cooking time. For example, a tender roast requires a longer cooking time compared to a quick-cooking stew.

Altitude⁚ Higher altitudes can affect cooking times due to lower atmospheric pressure. You may need to adjust cooking times slightly for optimal results.

Recipe Recommendations⁚ Always consult your recipe for recommended cooking times. Many recipes specifically indicate the optimal pressure cooking time for the dish.

Experimentation⁚ With time and experience, you’ll develop a feel for the ideal cooking times for your favorite ingredients and dishes.

Pressure Release⁚ Once the cooking time is complete, you’ll need to release the pressure. The manual provides instructions for both quick and natural pressure release methods.

Releasing Pressure

Releasing the pressure in your Power Pressure Cooker XL is a crucial step after cooking. There are two primary methods for releasing pressure⁚ quick release and natural release. The choice of method depends on the dish you’ve prepared and your desired outcome.

Quick Release⁚ For dishes that require immediate pressure release, such as vegetables or quick-cooking meats, use the quick release method. To do this, carefully turn the pressure valve to the “OPEN” position. Be prepared for a burst of steam, so stand back and use caution.

Natural Release⁚ For dishes that benefit from a gradual pressure release, such as tougher meats or beans, use the natural release method. This involves letting the pressure release naturally over time. Simply allow the pressure valve to stay in the “SEAL” position until the pressure gauge drops to zero.

Important Considerations⁚

Safety⁚ Always use caution when releasing pressure. Never point the steam vent towards yourself or others.

Pressure Gauge⁚ Monitor the pressure gauge closely to ensure the pressure has fully released before opening the lid.

Steam⁚ The steam released during the pressure release process can be hot; Be careful not to touch the steam vent.

Lid⁚ Never open the lid of the Power Pressure Cooker XL while there is still pressure inside. Allow the pressure to fully release before attempting to remove the lid.

Cleaning and Maintenance

Keeping your Power Pressure Cooker XL clean and well-maintained is essential for optimal performance and longevity. Here’s a step-by-step guide to cleaning and maintenance⁚

Cleaning⁚

  • After Each Use⁚ Wash the inner pot, lid, and rubber gasket with warm soapy water. Avoid using harsh abrasives or scouring pads; Rinse thoroughly and dry all parts completely.
  • Regular Cleaning⁚ The exterior of the Power Pressure Cooker XL can be wiped clean with a damp cloth. Avoid immersing the base unit in water.
  • Cleaning the Pressure Valve⁚ Periodically remove the pressure valve and clean it with a soft brush. Make sure the valve is free of any debris.

Maintenance⁚

  • Inspect the Gasket⁚ Regularly check the rubber gasket for wear and tear. Replace it if necessary.
  • Store Properly⁚ Store the Power Pressure Cooker XL in a cool, dry place when not in use.
  • Avoid Overfilling⁚ Always leave enough space for steam to circulate during cooking. Overfilling can lead to pressure buildup and potential hazards.

By following these simple cleaning and maintenance guidelines, you can ensure that your Power Pressure Cooker XL remains in top condition and continues to deliver delicious and convenient meals for years to come.

aprilaire model 700 installation manual

This manual provides instructions for installing the Aprilaire Model 700 humidifier․ It covers installation options‚ safety precautions‚ humidifier dimensions‚ installation template‚ parts list‚ wiring diagram‚ orientation of the Aprilaire Model 700‚ automatic and manual modes‚ troubleshooting‚ maintenance instructions‚ warranty information‚ and frequently asked questions․ The Model 700 can be installed on either the supply plenum or cold air return of a forced air handling system․ It is recommended to use hot water (140F max) to provide maximum evaporative capacity․ Please read all safety instructions and the installation template before starting the installation process․

Installation Options

The Aprilaire Model 700 and 700M can be installed in two primary locations within your forced air heating and cooling system⁚ the supply plenum and the cold air return․ The choice between these two options depends on several factors‚ including the specific layout of your HVAC system‚ the available space‚ and the accessibility for maintenance․

Supply Plenum Installation⁚ This installation method involves placing the humidifier directly within the supply plenum‚ the area where warm air is distributed throughout your home․ This is often the preferred option due to its ease of access for maintenance and the potential for improved humidification efficiency․ The humidifier sits within the warm air stream‚ allowing for optimal water evaporation and distribution of humidified air․

Cold Air Return Installation⁚ Alternatively‚ the humidifier can be installed in the cold air return‚ the area where air is drawn back into the HVAC system․ This option is often chosen in situations where space in the supply plenum is limited․ However‚ it’s important to note that the humidification efficiency might be slightly lower compared to a supply plenum installation because the water has to evaporate in a cooler air stream․

Regardless of the chosen installation method‚ it’s crucial to consider the humidifier’s dimensions and serviceability․ Ensure that the selected location allows for proper airflow‚ convenient access for maintenance‚ and sufficient clearance for the humidifier’s components․

Safety Precautions

Before you begin installing the Aprilaire Model 700 humidifier‚ it’s crucial to prioritize safety․ These precautions will help ensure a smooth and hazard-free installation process⁚

  1. Disconnect Electrical Power⁚ Prioritize safety by disconnecting the electrical power to the furnace before starting the installation․ This step eliminates the risk of electrical shock while working on the humidifier and HVAC system․
  2. Freezing Temperatures⁚ Avoid installing the humidifier in areas prone to freezing temperatures․ The water within the humidifier can freeze‚ potentially damaging the unit and leading to malfunctions․
  3. Hot Water⁚ While hot water is recommended for optimal performance‚ be cautious when handling it during the installation process․ Avoid direct contact with the hot water lines to prevent burns․
  4. Multi-Outlet Power Cord⁚ Do not connect the Model 700M or 700A power cord to a multi-outlet power cord․ This practice can overload the circuit and potentially cause electrical hazards․ Use a dedicated outlet designed for the humidifier․
  5. Qualified Installer⁚ For optimal installation and to ensure safety compliance‚ consider hiring a qualified HVAC technician for the installation process․ They possess the expertise and knowledge to handle the installation correctly and address any potential issues․

By adhering to these safety precautions‚ you can minimize risks and ensure a successful and safe installation of your Aprilaire Model 700 humidifier․

Humidifier Dimensions

Understanding the dimensions of the Aprilaire Model 700 humidifier is crucial for proper installation and ensuring sufficient space for the unit within your HVAC system․ The humidifier’s size and shape play a significant role in determining the best location for installation‚ ensuring ease of access for maintenance and service‚ and avoiding any potential interference with other components in the system․

Here are the key dimensions of the Aprilaire Model 700 humidifier⁚

  • Width⁚ 15 inches․ This dimension indicates the horizontal space required for the humidifier within the supply plenum or cold air return․
  • Height⁚ This dimension will vary depending on the specific model and configuration of the Aprilaire Model 700 humidifier․ Refer to the manufacturer’s specifications or the installation template for accurate height measurements․
  • Depth⁚ Similar to the height‚ the depth will vary depending on the model and configuration․ Consulting the manufacturer’s documentation will provide precise depth measurements․

By carefully considering these dimensions‚ you can ensure a proper fit for the Aprilaire Model 700 humidifier within your HVAC system‚ allowing for efficient operation and easy maintenance․

Installation Template

The Aprilaire Model 700 installation template is an essential tool for ensuring proper installation and alignment of the humidifier within your HVAC system․ It serves as a visual guide‚ outlining the precise location and orientation of the humidifier in relation to the ductwork and other components․ By utilizing the template‚ you can avoid costly mistakes and ensure the humidifier is installed correctly for optimal performance․

The installation template typically includes⁚

  • Cutout Dimensions⁚ The template will specify the exact size and shape of the opening required in the ductwork for installing the Aprilaire Model 700 humidifier․ This ensures a snug fit and prevents any air leaks․
  • Mounting Points⁚ The template will indicate the locations for mounting the humidifier to the ductwork․ This ensures secure and stable installation and prevents the humidifier from shifting or vibrating during operation․
  • Wiring Connections⁚ The template may also provide guidance on the location and connection points for the humidifier’s electrical wiring․ This helps ensure proper electrical connections and safe operation․

It is crucial to carefully follow the instructions provided with the installation template and ensure that the humidifier is installed in accordance with the template’s specifications․ This will ensure proper airflow‚ optimal performance‚ and a long lifespan for your Aprilaire Model 700 humidifier․

Parts List

The Aprilaire Model 700 humidifier comes with a comprehensive set of parts designed for efficient and reliable humidification․ Understanding the parts list is crucial for successful installation and maintenance․ It allows you to identify and locate components during the installation process and ensures you have all the necessary parts for a smooth operation․ Here’s a typical breakdown of the parts included with the Aprilaire Model 700⁚

  • Humidifier Housing⁚ The main body of the humidifier‚ which houses the water panel‚ evaporator‚ and other essential components․
  • Water Panel⁚ A replaceable component that absorbs water and releases it into the air stream for humidification․
  • Evaporator⁚ A fan that circulates air over the water panel‚ promoting evaporation and increasing humidity levels․
  • Humidifier Control⁚ A digital or manual control unit that regulates the humidifier’s operation‚ setting the desired humidity levels and adjusting the humidifier’s output․
  • Wiring Harness⁚ Connects the humidifier control to the humidifier housing and provides power to the evaporator fan․
  • Water Level Sensor⁚ Monitors the water level in the humidifier and shuts off the humidifier when the water level is low․
  • Transformer⁚ Converts the standard household voltage to a lower voltage suitable for operating the humidifier’s control unit․
  • Mounting Hardware⁚ Includes screws‚ brackets‚ and other fasteners for securely attaching the humidifier to the ductwork․
  • Installation Template⁚ A visual guide used for proper placement and alignment of the humidifier during installation․

It’s important to note that specific parts may vary depending on the model and configuration of your Aprilaire Model 700 humidifier․ Refer to the user manual or contact Aprilaire customer support for detailed information about the parts included with your specific model․

Wiring Diagram

The wiring diagram for the Aprilaire Model 700 humidifier is a crucial guide for connecting the humidifier control‚ power source‚ and other components․ It ensures proper electrical connections‚ preventing short circuits and ensuring safe and efficient operation․ Understanding the wiring diagram is essential for a successful installation‚ and it’s recommended to consult it throughout the process․

The diagram typically shows the following components and their connections⁚

  • Humidifier Control⁚ The digital or manual control unit that receives power from the transformer and controls the humidifier’s operation․
  • Transformer⁚ Converts the standard household voltage to a lower voltage suitable for operating the humidifier’s control unit․
  • Evaporator Fan⁚ The fan that circulates air over the water panel for humidification‚ receiving power from the humidifier control․
  • Water Level Sensor⁚ Monitors the water level in the humidifier and shuts off the humidifier when the water level is low․
  • Power Source⁚ The electrical outlet that provides power to the transformer and ultimately the humidifier’s control unit․
  • Return Duct⁚ The duct where the humidifier is installed‚ connecting the humidifier control to the furnace’s control system․

The wiring diagram uses symbols and colors to represent different wires and their connections․ Carefully following the diagram’s instructions is crucial for proper wiring․ If you have any doubts or concerns about the wiring‚ consult the user manual or contact Aprilaire customer support for assistance․

Orientation of Aprilaire Model 700

The correct orientation of the Aprilaire Model 700 humidifier in relation to the cooling coils is crucial for optimal performance and efficiency․ The manufacturer’s instructions provide specific guidelines for positioning the humidifier to ensure proper air flow and prevent potential issues․

The recommended orientation is to install the humidifier on the supply plenum or cold air return of a forced air handling system․ The humidifier should be positioned so that the air flow from the furnace or air handler passes through the humidifier before reaching the supply plenum or cold air return․ This ensures that the air is properly humidified before entering the living spaces․

The orientation should also consider the location of the cooling coils․ The humidifier should be installed upstream of the cooling coils to prevent the humidifier from becoming blocked by the coils․ The manufacturer’s instructions will provide a clear illustration of the recommended orientation and any specific considerations based on the type of HVAC system․ Following these instructions will ensure a successful installation and optimal performance of the Aprilaire Model 700 humidifier․

Automatic Mode

The Aprilaire Model 700 humidifier‚ when operating in automatic mode‚ offers a precise and convenient way to maintain desired humidity levels within your home․ This sophisticated system utilizes a digital control that monitors indoor and outdoor temperature fluctuations‚ automatically adjusting the humidity output to ensure a comfortable and healthy environment․

The control system features a built-in sensor that continuously measures the relative humidity (RH) inside your home․ It then compares this reading to the set point you’ve selected․ The set point represents the desired humidity level you want to maintain․ Based on these readings‚ the control automatically activates or deactivates the humidifier to adjust the humidity levels accordingly․

For every 1°F change in the outdoor temperature‚ the control automatically adjusts the indoor relative humidity by 1/2 (RH)․ This intelligent system compensates for temperature variations‚ ensuring that your home’s humidity remains within the desired range even as outdoor conditions change․ Automatic mode provides a worry-free approach to maintaining optimal humidity levels‚ creating a more comfortable and healthy living environment for you and your family․

Manual Mode

The Aprilaire Model 700 humidifier offers a manual mode option‚ providing you with direct control over the humidification process․ This mode allows you to manually adjust the humidity level to your preference‚ offering greater flexibility and control over the comfort of your home environment․

To utilize manual mode‚ simply rotate the control knob to the desired humidity setting․ The humidifier will activate whenever the HVAC system fan is running and the current humidity level is below the set point․ This allows you to fine-tune the humidity output based on your specific needs and preferences‚ ensuring optimal comfort throughout the day․

Manual mode is particularly useful in situations where you may want to temporarily adjust the humidity level for specific activities or preferences․ For example‚ you might choose to increase the humidity during dry winter months or lower it during humid summer days․ The manual control allows you to tailor the humidification process to your specific comfort requirements‚ creating a personalized environment that suits your needs․

Troubleshooting

While the Aprilaire Model 700 humidifier is designed for reliable operation‚ occasional issues may arise․ This section provides guidance on troubleshooting common problems to help you identify and resolve them efficiently․

If the humidifier is not producing sufficient moisture‚ check the water supply for adequate pressure and flow․ Ensure the water panel is clean and free of mineral buildup‚ which can hinder water absorption and evaporation․ Verify the HVAC system fan is running correctly‚ as it plays a crucial role in circulating humidified air throughout the house․

If the humidifier is producing excessive moisture‚ adjust the humidity setting lower․ Inspect the water level sensor for proper functioning‚ as a faulty sensor can lead to over-humidification․ If the humidifier is making unusual noises‚ check the water panel and fan for any obstructions or debris that may cause vibrations or rattling․

For persistent problems‚ consult the Aprilaire Model 700 installation manual for detailed troubleshooting steps and potential solutions․ If the issue persists‚ contact Aprilaire customer support for professional assistance and guidance․

Maintenance Instructions

Regular maintenance is essential for ensuring optimal performance and longevity of your Aprilaire Model 700 humidifier․ This section outlines key maintenance procedures to keep your humidifier running smoothly and effectively․

At least once a month‚ inspect the water panel for mineral buildup․ If present‚ clean it thoroughly using a solution of vinegar and water․ Rinse the water panel thoroughly and allow it to dry completely before reinstalling it․ Also‚ inspect the water level sensor for any blockages or debris that may impede its operation․ Clean the sensor gently with a soft brush or cloth․

Periodically‚ check the humidifier’s drain line for any clogs or blockages․ Clean the drain line with a pipe cleaner or similar tool to ensure proper drainage and prevent water from accumulating in the unit․

To ensure the humidifier’s proper operation‚ replace the water panel every two years‚ or sooner if it shows signs of wear and tear․ Refer to the Aprilaire Model 700 installation manual for detailed instructions on replacing the water panel․ By adhering to these maintenance recommendations‚ you can extend the lifespan of your Aprilaire Model 700 humidifier and enjoy consistent humidification throughout your home․

Warranty Information

Aprilaire offers a comprehensive warranty on its products‚ including the Model 700 humidifier․ The warranty covers defects in materials and workmanship under normal use and service conditions․ Specific warranty terms and conditions may vary depending on the purchase date and location of purchase․ It is essential to review the warranty documentation provided with your humidifier for complete details․

The warranty typically covers the humidifier’s components‚ including the water panel‚ control panel‚ and other essential parts․ However‚ the warranty may not cover damage caused by improper installation‚ misuse‚ neglect‚ or natural disasters․ To ensure your warranty coverage‚ it is recommended to have your Aprilaire Model 700 humidifier installed by a qualified professional and to follow the recommended maintenance procedures outlined in the installation manual․

In the event of a warranty claim‚ contact Aprilaire customer service for assistance․ Provide the model number‚ serial number‚ and purchase date for efficient processing of your claim․ Aprilaire’s warranty provides peace of mind and assurance that your humidifier is protected against manufacturing defects․

drivers manual georgia 2024

Georgia Driver’s License Handbook 2024⁚ A Comprehensive Guide

This handbook is an essential resource for anyone seeking to obtain a Georgia driver’s license or permit. It covers all aspects of Georgia’s driving laws‚ regulations‚ and requirements‚ making it a valuable tool for both new and experienced drivers. The handbook is regularly updated to reflect the latest changes in Georgia’s driving laws and practices.

Overview

The Georgia Driver’s License Handbook 2024 serves as a comprehensive guide for aspiring and current drivers in the state. It provides a detailed explanation of Georgia’s driving laws‚ regulations‚ and procedures‚ ensuring a smooth and safe driving experience. The handbook is designed to inform readers about the necessary steps to obtain a driver’s license or permit‚ including eligibility requirements‚ application procedures‚ and testing information. It also covers essential topics like traffic laws‚ road signs‚ safe driving practices‚ and other crucial information related to driving in Georgia.

Eligibility and Requirements

To obtain a Georgia driver’s license or permit‚ individuals must meet specific eligibility requirements. These requirements typically include proof of identity‚ residency‚ and age. Applicants must provide valid identification documents‚ such as a birth certificate‚ passport‚ or social security card. They must also demonstrate residency in Georgia by providing documents like a utility bill‚ lease agreement‚ or voter registration card. Age requirements vary depending on the type of license or permit being sought. For example‚ individuals applying for a learner’s permit must be at least 15 years old‚ while those applying for a driver’s license must be at least 16 years old. Additional requirements may apply‚ such as passing a vision test‚ written exam‚ and driving test.

Obtaining a License‚ Permit‚ or ID

The process for obtaining a driver’s license‚ permit‚ or identification card in Georgia involves several steps. Applicants must first visit a Georgia Department of Driver Services (DDS) office. At the office‚ they will need to complete an application form and provide the required documents‚ including proof of identity‚ residency‚ and age. They will also need to pay the applicable fees. Next‚ applicants must pass a vision test and written exam to demonstrate their knowledge of Georgia’s traffic laws and regulations. Finally‚ they must pass a driving test to demonstrate their ability to operate a vehicle safely. Once all requirements are met‚ the DDS will issue the applicant a driver’s license‚ permit‚ or identification card.

Testing Information

To obtain a Georgia driver’s license‚ individuals must pass a series of tests‚ including a vision test‚ a written exam‚ and a driving test. The vision test evaluates the applicant’s ability to see clearly‚ while the written exam assesses their knowledge of Georgia’s traffic laws‚ road signs‚ and safe driving practices. The driving test evaluates the applicant’s ability to safely operate a vehicle under the supervision of a DDS examiner. The tests are designed to ensure that all drivers in Georgia possess the necessary knowledge and skills to operate a vehicle safely. Successful completion of these tests is essential for obtaining a Georgia driver’s license.

Other Services and Information

The Georgia Department of Driver Services (DDS) offers a range of services beyond just issuing driver’s licenses and permits. These services include vehicle registration and titling‚ driver’s license renewal‚ duplicate license issuance‚ and address changes. The DDS also provides information on topics such as safe driving practices‚ road safety‚ and traffic laws. Additionally‚ the DDS offers resources for individuals with disabilities‚ including information on accessible vehicles and driving aids. The DDS is committed to providing a comprehensive range of services to ensure the safety and convenience of Georgia’s drivers.

Understanding Georgia’s Driving Laws

This section provides a comprehensive overview of Georgia’s traffic laws‚ regulations‚ and safe driving practices‚ ensuring that drivers are well-informed and prepared to navigate the roads safely and responsibly.

Traffic Laws and Regulations

This section delves into the specific traffic laws and regulations that govern driving in Georgia. It covers crucial aspects such as speed limits‚ right-of-way rules‚ lane usage‚ and parking restrictions. Drivers will learn about the importance of obeying traffic signals‚ signs‚ and markings‚ as well as the consequences of violating these regulations. The handbook emphasizes the need for drivers to be aware of and adhere to all traffic laws to ensure the safety of themselves and others on the road.

Road Signs and Signals

Understanding road signs and signals is paramount for safe driving. This section of the handbook provides a comprehensive guide to various types of signs‚ including warning signs‚ regulatory signs‚ and guide signs. It details the meaning of each sign and how drivers should respond to them. The handbook also explains the different types of traffic signals‚ such as stop signs‚ yield signs‚ and traffic lights‚ and how drivers should navigate intersections with these signals. By understanding the meaning of these signs and signals‚ drivers can make informed decisions and avoid potential hazards on the road.

Safe Driving Practices

This section emphasizes the importance of responsible driving habits. It covers a wide range of topics‚ including defensive driving techniques‚ maintaining a safe following distance‚ avoiding distractions while driving‚ and the dangers of speeding and aggressive driving. The handbook also highlights the importance of being aware of your surroundings‚ anticipating potential hazards‚ and reacting appropriately to them. It provides tips on how to stay alert and focused while driving‚ such as taking breaks when needed‚ avoiding driving when fatigued‚ and avoiding the use of cell phones or other electronic devices while behind the wheel. By adhering to these safe driving practices‚ drivers can significantly reduce the risk of accidents and ensure the safety of themselves and others on the road.

Preparing for the Georgia Driver’s License Test

This section provides guidance for individuals preparing to take the Georgia driver’s license test. It covers key aspects such as studying the Georgia Driver’s Manual‚ utilizing practice tests‚ and employing effective study strategies.

Georgia Driver’s Manual

The Georgia Driver’s Manual is an indispensable resource for anyone preparing to take the Georgia driver’s license test. It contains comprehensive information on Georgia’s traffic laws‚ road signs‚ safe driving practices‚ and other essential knowledge required to become a safe and responsible driver. The manual is available in multiple languages and formats‚ including an audio version‚ to cater to diverse learning preferences. The Georgia Department of Driver Services (DDS) regularly updates the manual to reflect any changes in driving laws or regulations. It is crucial to study the most recent version of the manual thoroughly to ensure you are well-prepared for the written exam. The manual serves as the foundation for understanding Georgia’s driving rules and regulations‚ making it a vital part of the preparation process.

Practice Tests

Practice tests are an invaluable tool for reinforcing your knowledge of Georgia’s driving laws and regulations. They provide a simulated testing environment‚ allowing you to familiarize yourself with the format and types of questions you can expect on the actual driver’s license exam. By taking practice tests‚ you can identify your strengths and weaknesses‚ focusing your study efforts on areas where you need improvement. Many online resources offer free practice tests that are specifically tailored to Georgia’s driver’s license requirements. These practice tests often include detailed explanations for each answer‚ helping you understand the rationale behind the correct choices. Regular practice with these tests can boost your confidence and improve your chances of success on the official exam.

Study Tips and Strategies

Effective study habits are crucial for acing the Georgia driver’s license test. Start by understanding the structure and content of the Georgia Driver’s Manual. Break down the material into manageable sections and focus on key concepts like traffic laws‚ road signs‚ and safe driving practices. Active learning techniques‚ such as summarizing information in your own words‚ creating flashcards‚ or discussing concepts with others‚ can enhance your understanding and retention. Practice tests are essential for gauging your progress and identifying areas that require further attention. Don’t hesitate to seek clarification on any confusing topics. Online resources and driving schools offer additional support and guidance. Most importantly‚ prioritize quality over quantity‚ ensuring that you grasp the concepts thoroughly. A well-structured study plan‚ combined with consistent effort‚ will set you up for success on the Georgia driver’s license exam.

Additional Resources

Beyond the Georgia Driver’s Manual‚ various resources can supplement your learning journey.

Georgia Department of Driver Services (DDS)

The Georgia Department of Driver Services (DDS) is your primary source for all things related to driver licensing in Georgia. Their website provides access to the official Georgia Driver’s Manual‚ practice tests‚ and other important information. You can also find details on scheduling appointments for license tests‚ renewing your license‚ and accessing other services offered by the DDS. Contact the DDS directly for inquiries or assistance with any driver license-related matters. Their website also features a handy online chat function to get quick answers to your questions. The DDS ensures a smooth and reliable process for acquiring and maintaining your Georgia driver’s license.

Driving Schools and Courses

Enrolling in a driving school or course can significantly enhance your driving skills and knowledge‚ preparing you for the challenges of the road. These programs provide professional instruction‚ practical experience‚ and a comprehensive understanding of Georgia’s driving laws and regulations. Driving schools often offer both classroom and behind-the-wheel training‚ allowing you to gain confidence and competence in various driving situations. The DDS recommends taking a driver’s education course‚ especially for new drivers‚ as it can help reduce the risk of accidents and contribute to safer driving practices. Look for reputable driving schools in your area and choose a program that aligns with your learning style and goals.

Online Resources and Apps

The digital age offers a wealth of online resources and mobile applications designed to assist Georgia drivers in their learning journey. Numerous websites and apps provide access to the official Georgia Driver’s Manual‚ practice tests for the written and road exams‚ and informative videos and articles on driving safety and road rules. These digital tools allow you to study at your own pace‚ test your knowledge‚ and gain insights into driving practices. Interactive platforms often incorporate gamification elements to enhance learning engagement. Look for reputable online resources and apps that are regularly updated to ensure accuracy and compliance with current Georgia driving laws. Remember to utilize these resources responsibly and supplement them with traditional learning methods for a well-rounded driving education.

Obtaining a Georgia driver’s license is a significant milestone‚ empowering individuals with the freedom and responsibility of navigating the roads. The Georgia Driver’s License Handbook 2024 serves as a comprehensive guide‚ equipping aspiring drivers with the knowledge and skills necessary to succeed in the licensing process and become responsible‚ safe drivers. By thoroughly studying the handbook and utilizing available resources‚ individuals can confidently prepare for the written and road exams‚ ensuring a smooth transition into the world of driving. Embrace the opportunity to learn and practice‚ and commit to upholding the highest standards of safe driving on Georgia’s roads.

hpf-ps10 manual

HPF-PS10 Manual⁚ A Comprehensive Guide

This comprehensive manual provides a detailed guide to the HPF-PS10, a 10-amp remote power supply with battery charger. It covers installation, operation, troubleshooting, technical specifications, and safety precautions. This manual is a valuable resource for anyone installing, configuring, or maintaining the HPF-PS10, whether you’re an A&E, dealer, installer, or end user.

Introduction

The HPF-PS10 is a high-performance, 10-amp remote power supply with a built-in battery charger designed for use in fire alarm systems. It is a versatile and reliable power source that can be used in a variety of applications, including standalone power supply or in conjunction with a fire alarm control panel (FACP). This manual provides a comprehensive guide to the HPF-PS10, covering its key features, installation, operation, troubleshooting, and maintenance. This manual is intended for use by qualified personnel who are familiar with fire alarm systems and electrical safety practices. It is essential to read and understand this manual before installing, operating, or maintaining the HPF-PS10.

The HPF-PS10 is a direct replacement for the FL-PS10/SK-PS10 and provides 24 VDC power for Notification Appliance Circuits (NACs) configured as either Class B or Class A. It features a filtered 24 VDC output that can be configured to drive up to seven Class B NACs. The HPF-PS10 also offers ADA-compliant strobe synchronization, ensuring that strobe lights operate in sync with audible alarms. The HPF-PS10 is a key component in ensuring the reliability and effectiveness of fire alarm systems, providing continuous power in the event of a power outage and supporting the operation of critical fire safety devices.

Key Features and Benefits

The HPF-PS10 is a powerful and versatile remote power supply designed to meet the demanding requirements of modern fire alarm systems. It boasts a range of features and benefits that enhance its performance, reliability, and ease of use. Some of the key features of the HPF-PS10 include⁚

  • 10 Amp Capacity⁚ The HPF-PS10 provides a robust 10-amp output, capable of powering a wide range of fire alarm devices, including notification appliances, detectors, and control panels.
  • Battery Charger⁚ The built-in battery charger ensures a continuous power supply, even in the event of a power outage, guaranteeing the uninterrupted operation of critical fire safety equipment.
  • Configurable Outputs⁚ The HPF-PS10 offers seven configurable outputs, allowing for flexible and efficient power distribution to meet the specific needs of various fire alarm system configurations.
  • LED Diagnostics⁚ LED indicators provide clear visual status updates, facilitating quick and easy troubleshooting of potential issues.
  • ADA-Compliant Strobe Synchronization⁚ The HPF-PS10 ensures seamless synchronization of strobe lights with audible alarms, enhancing the overall effectiveness of fire alarm systems and ensuring compliance with accessibility regulations.
  • Direct Replacement⁚ The HPF-PS10 serves as a direct replacement for the FL-PS10/SK-PS10, offering a seamless upgrade path for existing fire alarm systems.

These features and benefits make the HPF-PS10 a valuable asset for any fire alarm system, ensuring reliable power, flexibility, and ease of operation.

Installation and Setup

Installing and setting up the HPF-PS10 is a straightforward process, but it’s essential to follow the instructions carefully to ensure proper operation and safety. The installation manual provides a detailed guide, covering all aspects of the installation process, from mounting the unit to connecting the wiring.

Before beginning installation, it’s crucial to ensure that the location chosen for the HPF-PS10 meets the requirements outlined in the manual. This includes factors such as ambient temperature, humidity, and proximity to other equipment. The installation process involves mounting the HPF-PS10 securely to a suitable surface, ensuring proper ventilation, and connecting the wiring to the appropriate terminals. The wiring connections should be made carefully, ensuring that the correct polarity is maintained to avoid damage to the unit.

Once the HPF-PS10 is physically installed, it’s necessary to configure the unit to meet the specific requirements of the fire alarm system. This involves setting the desired output voltage, configuring the outputs to match the intended applications, and setting up any necessary synchronization or communication protocols. The configuration process can typically be accomplished using a programming tool or software provided by Honeywell, allowing installers to customize the HPF-PS10 to seamlessly integrate with the existing fire alarm system.

Operation and Configuration

The HPF-PS10 operates as a reliable remote power supply, providing 24 VDC power to various fire alarm system components. Its key function is to ensure continuous power to these components, even in the event of a power outage. The HPF-PS10 features a built-in battery charger that maintains the battery’s charge, ensuring that the system remains operational during power interruptions. The unit’s configurable outputs allow you to tailor its power distribution to meet the specific needs of your fire alarm system.

The HPF-PS10 provides power to Notification Appliance Circuits (NACs), which are dedicated circuits for fire alarm signaling devices such as horns, strobes, and speakers. The unit’s outputs can be configured to support both Class B and Class A NACs, offering flexibility in system design. For Class A NACs, the unit requires the use of a ZNAC module to ensure proper operation. The HPF-PS10 also provides auxiliary power for various other fire alarm system components, such as detectors, annunciators, and door holders.

Configuration of the HPF-PS10 involves setting the desired output voltage, configuring the outputs to match the intended applications, and setting up any necessary synchronization or communication protocols; This can typically be accomplished using a programming tool or software provided by Honeywell, allowing installers to customize the HPF-PS10 to seamlessly integrate with the existing fire alarm system.

Troubleshooting and Maintenance

Regular maintenance is essential for ensuring the reliable operation of the HPF-PS10. This involves visually inspecting the unit for any signs of damage, such as loose connections, broken wires, or physical damage to the enclosure. It is also crucial to check the battery connections and ensure they are secure and free from corrosion. Periodically testing the battery’s charge is also essential to guarantee it can deliver the necessary power during a power outage. Refer to the HPF-PS10 manual for recommended battery testing intervals and procedures.

Troubleshooting the HPF-PS10 typically involves identifying and addressing any issues that may be affecting its functionality. The unit is equipped with LED diagnostics that provide visual indicators of its operating status. These LEDs can help identify problems such as AC power failure, battery problems, or output circuit faults. In case of malfunction, consult the HPF-PS10 manual for troubleshooting guides and diagnostic codes. If the issue cannot be resolved through basic troubleshooting steps, contacting a qualified technician is recommended.

Maintaining the HPF-PS10 involves keeping the unit clean and free from dust and debris. Avoid using harsh chemicals or solvents for cleaning, as these could damage the unit’s components. Regularly checking the HPF-PS10’s operation and performing maintenance procedures will help ensure its long-term reliability and optimal performance, contributing to the overall safety and security of the fire alarm system.

Technical Specifications

The HPF-PS10 is a powerful and versatile remote power supply designed to meet the demanding requirements of modern fire alarm systems. It boasts a robust 10-amp output capacity, enabling it to power a variety of notification appliances and circuits, including Class B and Class A NACs. The HPF-PS10 is equipped with a built-in battery charger, ensuring reliable backup power in the event of an AC power outage. Its compatibility with both 12- and 24-volt fire alarm control panels (FACPs) provides flexibility in system integration.

Key technical specifications of the HPF-PS10 include⁚

  • Output current⁚ 10 amps
  • Output voltage⁚ 24 VDC
  • Input voltage⁚ 120 VAC (HPF-PS10B) or 240 VAC (HPF-PS10E)
  • Battery capacity⁚ Up to 33 AH (in a separate enclosure)
  • Number of configurable outputs⁚ 7
  • Dimensions⁚ 11.75″ x 7.75″ x 4.5″ (H x W x D)
  • Weight⁚ 10 lbs (approximate)

The HPF-PS10 also incorporates features like ADA-compatible strobe synchronization and filtered 24 VDC output, ensuring compliance with industry standards and providing a reliable power source for critical fire alarm applications. These technical specifications highlight the HPF-PS10’s capabilities and suitability for various fire alarm installations. For detailed information about specific features and performance characteristics, refer to the HPF-PS10 instruction manual.

Compatibility and Applications

The HPF-PS10 is designed for compatibility with a wide range of fire alarm systems and components, making it a versatile and reliable power source for various applications. It is compatible with both 12- and 24-volt fire alarm control panels (FACPs), offering flexibility in system integration. The HPF-PS10 is also compatible with various notification appliance circuits (NACs), including Class B and Class A NACs, allowing it to power a wide array of fire alarm devices.

The HPF-PS10’s versatility extends to its applications. It can be used as a standalone power supply, providing reliable power for critical fire alarm components in various settings. Additionally, it can be integrated into larger fire alarm systems, acting as a remote power source for NACs, detectors, annunciators, and other devices. Its compatibility with the ZNAC module enables the use of Class A NACs, expanding its application possibilities.

The HPF-PS10 is suitable for a wide range of applications, including⁚

  • Commercial buildings
  • Industrial facilities
  • Residential buildings
  • Schools
  • Hospitals
  • Hotels
  • Retail stores

Its robust design, compatibility, and reliability make the HPF-PS10 an essential component for ensuring the safety and functionality of fire alarm systems in diverse settings. For specific compatibility information and application recommendations, refer to the HPF-PS10 instruction manual.

Safety Precautions

The HPF-PS10 is a powerful device that requires proper handling and installation to ensure safety. Before working with the HPF-PS10, it is crucial to understand and follow these safety precautions⁚

  • Disconnect Power⁚ Always disconnect power to the HPF-PS10 and any connected devices before performing any installation, maintenance, or repair work. This prevents electrical shock and potential damage.
  • Qualified Personnel⁚ Installation, maintenance, and repair of the HPF-PS10 should be performed by qualified and trained personnel. They are equipped with the necessary knowledge and safety protocols to work with electrical equipment.
  • Fire Hazards⁚ The HPF-PS10 contains a battery that may pose a fire hazard if mishandled. Avoid placing the unit near flammable materials or in areas with high temperatures. Proper ventilation is crucial to prevent overheating and potential fire hazards.
  • Battery Disposal⁚ Follow all local regulations and guidelines for proper battery disposal. Never dispose of batteries in household trash. Recycling or specialized disposal methods should be used to minimize environmental impact.
  • Safety Equipment⁚ Always wear appropriate safety gear, including eye protection, gloves, and insulated tools when working with the HPF-PS10 or its components. This protects you from potential electrical hazards and injuries.
  • Grounding⁚ Ensure the HPF-PS10 is properly grounded to prevent electrical shock and ensure proper operation. Refer to the installation manual for specific grounding instructions.

By adhering to these safety precautions, you can minimize risks and ensure a safe working environment when installing, maintaining, or using the HPF-PS10. Always consult the HPF-PS10 instruction manual for detailed safety information and specific instructions related to your application.

Warranty and Support

Honeywell provides a comprehensive warranty for the HPF-PS10, ensuring peace of mind and protecting your investment. The specific warranty terms and conditions can vary depending on your region and purchase date. However, generally, the HPF-PS10 comes with a limited warranty that covers defects in materials and workmanship for a specified period. For detailed warranty information, including duration and coverage, refer to the accompanying documentation or visit the Honeywell website.

Beyond the warranty period, Honeywell offers ongoing support and resources to assist you with any questions, troubleshooting, or maintenance needs. You can access a variety of support options, including⁚

  • Online Resources⁚ Honeywell’s website provides a wealth of information, including user manuals, FAQs, troubleshooting guides, and technical specifications for the HPF-PS10. These resources can be helpful for resolving common issues or understanding the device’s functionality.
  • Customer Support⁚ Honeywell offers dedicated customer support channels for assistance with product-related inquiries. You can contact their support team via phone, email, or online chat for personalized help and expert guidance.
  • Authorized Dealers⁚ Honeywell has a network of authorized dealers who can provide local support, installation, and maintenance services for the HPF-PS10. Contact your local dealer for assistance with installation, repairs, or any other needs.

By leveraging these support resources, you can access the information and assistance you need to ensure the optimal performance and longevity of your HPF-PS10.

samsung dishwasher dw80m2020us manual

Samsung DW80M2020US Dishwasher Manual⁚ A Comprehensive Guide

This comprehensive guide provides a complete overview of the Samsung DW80M2020US dishwasher, covering everything from installation and operation to cleaning, troubleshooting, and warranty information. The manual includes detailed instructions and helpful tips to ensure optimal performance and longevity of your appliance.

Introduction

Welcome to the world of clean dishes with the Samsung DW80M2020US dishwasher! This manual is your guide to understanding and maximizing the features of your new appliance. Whether you’re a seasoned dishwasher user or a first-timer, this comprehensive resource will equip you with the knowledge to operate, maintain, and troubleshoot your DW80M2020US.

The DW80M2020US is designed to make your life easier by providing efficient and effective cleaning for your dishes. With its multiple wash cycles and innovative features, this dishwasher caters to various cleaning needs and ensures sparkling clean results.

This manual covers essential aspects of your dishwasher, including installation instructions, operating procedures, cleaning and maintenance tips, troubleshooting guides, safety precautions, and warranty information. Take your time to explore the contents and familiarize yourself with your DW80M2020US to unlock its full potential.

Key Features and Specifications

The Samsung DW80M2020US dishwasher is packed with features designed to deliver exceptional cleaning and convenience. Its key features include a 3rd rack for additional storage, a sleek stainless steel design, and a variety of wash cycles to accommodate different dish types and levels of soil.

Here are some of the notable specifications of the DW80M2020US⁚

  • Wash Cycles⁚ Auto, Normal, Heavy, Express 60
  • Options⁚ Hi-Temp Wash, Sanitize (Anti-bacterial)
  • Capacity⁚ 14 Place Settings
  • Noise Level⁚ 55 dBA
  • Energy Efficiency⁚ ENERGY STAR certified
  • Dimensions⁚ 24″ wide x 24″ deep x 34″ high

These features and specifications make the DW80M2020US a reliable and efficient choice for any kitchen, offering a combination of cleaning power, space-saving design, and energy efficiency.

Installation Guide

Installing your Samsung DW80M2020US dishwasher is a straightforward process. The installation guide provided with your appliance outlines the steps in detail, but here’s a general overview⁚

  1. Prepare the Location⁚ Choose a suitable location for your dishwasher, ensuring it is close to a water source and drain. Make sure the power outlet is readily accessible.
  2. Connect Water Supply⁚ Attach the water supply line to the dishwasher’s inlet valve, ensuring a secure connection. You may need to adjust the water pressure regulator for optimal performance.
  3. Connect Drain Hose⁚ Secure the drain hose to the dishwasher’s drain outlet and connect it to the drain pipe or garbage disposal. Make sure the hose is not kinked or obstructed.
  4. Level the Dishwasher⁚ Use adjustable legs to level the dishwasher, ensuring stability and proper operation.
  5. Electrical Connection⁚ Connect the dishwasher to a dedicated electrical outlet. Ensure the outlet is grounded and the circuit breaker is properly rated for the dishwasher’s power requirements.
  6. Final Checks⁚ Run a test cycle to verify proper water flow, drainage, and operation. Adjust settings as needed.

If you encounter any difficulties during installation, refer to the detailed instructions in the installation guide or contact a qualified technician for assistance.

Operating Instructions

Operating your Samsung DW80M2020US dishwasher is simple and intuitive. The control panel features clear icons and easy-to-understand instructions. Here’s a step-by-step guide⁚

  1. Load Dishes⁚ Place dishes in the dishwasher, ensuring they are properly arranged and not blocking the spray arms. Use the third rack for smaller items like utensils and cups.
  2. Add Detergent⁚ Fill the detergent dispenser with the recommended amount of dishwasher detergent. Choose a detergent specifically designed for dishwashers.
  3. Select Wash Cycle⁚ Select the appropriate wash cycle based on the type and level of soil on your dishes. The DW80M2020US offers various cycles, including Auto, Normal, Heavy, and Express 60.
  4. Select Options⁚ Depending on your needs, you can select additional options like Hi-Temp Wash, Sanitize (Anti-bacterial), and Delay Start.
  5. Start the Cycle⁚ Press the Start button to begin the wash cycle. The dishwasher will automatically run through the selected cycle and shut off when complete.

Refer to the detailed instructions in your owner’s manual for a comprehensive guide on using the specific features and functions of your DW80M2020US dishwasher.

Cleaning and Maintenance

Regular cleaning and maintenance are essential for ensuring your Samsung DW80M2020US dishwasher operates efficiently and delivers sparkling clean dishes. Here are some key steps⁚

  1. Clean the Filter⁚ Remove and clean the filter regularly to prevent clogs and ensure proper drainage. Refer to your manual for specific instructions on removing and cleaning the filter.
  2. Wipe Down Interior⁚ After each cycle, wipe down the interior of the dishwasher with a damp cloth to remove food particles and residue. Pay particular attention to the door seal and around the spray arms.
  3. Check and Clean Spray Arms⁚ Ensure the spray arms rotate freely and are not clogged with food debris. Clean the arms with a soft brush or toothpick if necessary.
  4. Use Rinse Aid⁚ Regularly refill the rinse aid dispenser to prevent spots and streaks on your dishes. Rinse aid helps to improve drying performance.
  5. Clean the Exterior⁚ Wipe down the exterior of the dishwasher with a damp cloth to remove fingerprints, smudges, and other blemishes.

Follow the cleaning and maintenance instructions provided in your DW80M2020US dishwasher owner’s manual for detailed guidance and specific recommendations for your model.

Troubleshooting

While the Samsung DW80M2020US dishwasher is designed for reliable performance, issues can arise. Here are some common troubleshooting tips⁚

  • Dishwasher Won’t Start⁚ Ensure the dishwasher is plugged in, the circuit breaker is not tripped, and the door is securely closed. Check for any error codes displayed on the control panel.
  • Dishes Not Clean⁚ Verify the dishwasher is using the appropriate wash cycle for the type of dishes. Ensure the detergent is fresh and the filter is clean. Check the spray arms for any blockages.
  • Dishes Not Drying⁚ Ensure the rinse aid dispenser is filled and the drain hose is not kinked. Consider increasing the drying temperature setting.
  • Leaking Dishwasher⁚ Check the drain hose for leaks or kinks. Inspect the door seal for damage. If the leak persists, contact Samsung customer support.
  • Loud Noises⁚ If the dishwasher is making unusual noises, check for any objects obstructing the spray arms or the filter. If the noise persists, contact Samsung customer support.

If you encounter persistent issues, consult the troubleshooting guide in your DW80M2020US dishwasher manual for detailed instructions and specific solutions.

Frequently Asked Questions

Here are some frequently asked questions about the Samsung DW80M2020US dishwasher, along with their answers⁚

  • What is the capacity of the DW80M2020US dishwasher? The Samsung DW80M2020US has a capacity of 14 place settings, making it suitable for medium-sized households.
  • Does the DW80M2020US dishwasher have a sanitize cycle? Yes, the DW80M2020US dishwasher features a sanitize cycle that effectively eliminates bacteria and germs, ensuring your dishes are hygienically clean.
  • How do I use the third rack in the DW80M2020US dishwasher? The third rack is ideal for utensils, small bowls, and other items that might not fit in the lower racks. It’s designed to hold a variety of shapes and sizes.
  • What types of detergent can I use in the DW80M2020US dishwasher? The DW80M2020US dishwasher is compatible with both powder and liquid detergents. Consult the manual for specific recommendations on detergent types and quantities.
  • How do I clean the filter in the DW80M2020US dishwasher? The filter is located at the bottom of the dishwasher. Remove it periodically and rinse it under running water to remove food particles and debris. Refer to your manual for detailed instructions.

For additional questions or more specific information, consult the comprehensive user manual or contact Samsung customer support.

Safety Precautions

To ensure safe and proper operation of your Samsung DW80M2020US dishwasher, please follow these safety precautions⁚

  • Disconnect power before servicing⁚ Always unplug the dishwasher from the power outlet before cleaning, performing maintenance, or making repairs. This prevents electrical shock hazards.
  • Do not operate with a damaged cord⁚ If the power cord is damaged, frayed, or shows signs of wear, do not use the dishwasher. A damaged cord poses a risk of electrical shock or fire.
  • Keep children away⁚ Never allow children to play near the dishwasher or operate it. The dishwasher’s high temperatures and moving parts can cause serious injuries.
  • Use appropriate detergent⁚ Use only dishwasher detergent specifically designed for automatic dishwashers. Using other cleaning agents can damage the appliance or cause harmful fumes.
  • Handle sharp objects carefully⁚ When loading the dishwasher, place sharp items in a manner that prevents them from poking through the racks or damaging the appliance. Ensure sharp objects are secured and protected.
  • Do not overload⁚ Avoid overloading the dishwasher. Overloading can prevent proper water circulation and cleaning, and it can also damage the appliance.
  • Check for leaks⁚ Regularly check for leaks around the dishwasher. Promptly address any leaks to prevent water damage and potential safety hazards.

By following these safety precautions, you can ensure the safe and efficient operation of your Samsung DW80M2020US dishwasher.

Warranty Information

Your Samsung DW80M2020US dishwasher comes with a limited warranty that covers defects in materials and workmanship. The warranty period and coverage details may vary depending on your region and purchase date. To access the specific warranty information for your dishwasher, refer to the warranty booklet that came with your appliance or visit the Samsung website.

The warranty typically covers repairs or replacements for defective components during the warranty period. However, it may not cover certain situations, such as damage caused by misuse, neglect, accidents, or unauthorized repairs. To ensure your warranty remains valid, it is essential to follow the instructions provided in this manual and use the appliance as intended;

In case of any warranty-related issues, contact Samsung customer support for assistance. They can help you determine if your issue is covered under warranty and guide you through the process of getting your dishwasher repaired or replaced.

Samsung DW80M2020US vs. Other Models

The Samsung DW80M2020US dishwasher is a solid choice in the mid-range category, offering a good balance of features and performance. To determine if it’s the right fit for your needs, it’s helpful to compare it to other Samsung models and dishwashers from competing brands.

Consider factors like capacity, wash cycles, noise level, energy efficiency, and additional features. For instance, some higher-end Samsung models offer advanced features like smart connectivity, automatic detergent dispensing, and adjustable racks for greater flexibility.

Compare the specifications and reviews of different models to find the best option for your kitchen and budget. If you prioritize quiet operation, energy efficiency, or specific wash cycles, you might find a different model that better aligns with your preferences.

Customer Reviews and Ratings

Customer reviews are a valuable resource when making a purchase decision, especially for appliances like dishwashers. Reading reviews for the Samsung DW80M2020US can provide insights into the real-world performance, pros, and cons of this model.

Look for reviews on websites like Amazon, Best Buy, and Consumer Reports, as well as manufacturer websites. Pay attention to ratings, comments on cleaning effectiveness, noise level, ease of use, and durability.

Consider the overall sentiment of the reviews, noting any common themes or recurring issues. This can help you gauge the satisfaction level of other users and make an informed decision about whether the Samsung DW80M2020US is the right dishwasher for you.

Where to Buy

The Samsung DW80M2020US dishwasher is widely available from various retailers, both online and in-store. Popular options include⁚

  • Amazon⁚ Amazon is a major online retailer offering a wide selection of appliances, including the Samsung DW80M2020US. They often provide competitive prices and convenient delivery options.
  • Best Buy⁚ Best Buy is a well-known electronics retailer with a physical presence across the US. They have a dedicated appliance section where you can find the Samsung DW80M2020US.
  • Home Depot⁚ Home Depot is another major retailer offering a wide range of home improvement products, including appliances. They usually carry the Samsung DW80M2020US in their appliance section.
  • Lowe’s⁚ Lowe’s is a competitor to Home Depot, also offering a broad selection of appliances. They likely carry the Samsung DW80M2020US as well.
  • Samsung Website⁚ Samsung’s official website provides information about their products and where to purchase them. You can find authorized retailers near you or buy directly from Samsung.

When buying, compare prices, delivery options, and any available promotions across different retailers to find the best deal.

The Samsung DW80M2020US dishwasher is a reliable and efficient appliance designed to make dishwashing a breeze. Its features, including multiple wash cycles, adjustable racks, and a quiet operation, provide a convenient and effective cleaning experience. The dishwasher’s sleek design complements various kitchen styles, while its energy efficiency helps save money on utility bills. With its user-friendly interface and comprehensive manual, the Samsung DW80M2020US is a great choice for homeowners looking for a high-quality dishwasher that delivers excellent cleaning performance and ease of use.

However, it’s important to carefully consider the dishwasher’s dimensions and ensure it fits your kitchen space before purchasing. Additionally, check for available promotions or discounts from various retailers to get the best deal. Overall, the Samsung DW80M2020US is a solid choice for those seeking a reliable and efficient dishwasher for their home.

leviton light switch manual

Leviton Light Switch Manuals⁚ A Comprehensive Guide

Leviton light switches are known for their reliability, versatility, and ease of use. Whether you’re a homeowner looking to upgrade your lighting system or an electrician working on a new construction project, understanding how to use and install Leviton light switches is essential. This comprehensive guide will walk you through the various types of Leviton light switches, their features, installation procedures, and troubleshooting tips. We’ll also provide information on where to find Leviton light switch manuals for specific models.

Introduction

Leviton, a leading manufacturer of electrical wiring devices and lighting controls, offers a wide range of light switches designed to meet the diverse needs of residential, commercial, and industrial applications. Leviton light switches are renowned for their quality, reliability, and innovative features, enhancing both functionality and aesthetics. Whether you’re looking to control your home’s lighting with smart technology, upgrade your existing switches, or simply need a replacement for a worn-out switch, Leviton has a solution for you.

Understanding the intricacies of Leviton light switches, from their operation to installation and troubleshooting, can save you time, effort, and potential headaches. This comprehensive guide will serve as your go-to resource for navigating the world of Leviton light switches, providing valuable insights into their various types, features, installation processes, and common troubleshooting issues. By familiarizing yourself with the information presented in this guide, you’ll gain the confidence to effectively manage and optimize your lighting system with Leviton’s reliable and user-friendly solutions.

Types of Leviton Light Switches

Leviton offers a diverse array of light switches to cater to various needs and preferences. From traditional toggle switches to modern smart switches, Leviton provides options for every lighting scenario. Here’s a breakdown of some of the common types of Leviton light switches⁚

  • Standard Toggle Switches⁚ These are the most basic and widely used type of light switch. They feature a simple on/off mechanism and are available in a variety of colors and finishes to match your décor.
  • Dimmer Switches⁚ Leviton dimmer switches allow you to control the brightness of your lights, offering a range of illumination levels for different moods and activities. They are compatible with various bulb types, including incandescent, LED, and CFL.
  • Motion Sensor Switches⁚ Leviton motion sensor switches provide hands-free lighting control. They automatically turn lights on when motion is detected and off when there’s no movement, enhancing security and energy efficiency.
  • Smart Switches⁚ Leviton smart switches integrate with home automation systems, enabling remote control, scheduling, and voice activation. They can be controlled through a smartphone app or voice assistants like Alexa or Google Assistant.
  • Combination Switches⁚ Leviton also offers combination switches that combine the functionality of multiple switch types, such as a dimmer switch with a motion sensor or a smart switch with a timer. These versatile switches simplify control and offer greater flexibility.

Choosing the right type of Leviton light switch depends on your specific needs and preferences. Consider factors like the type of lighting you’re controlling, your desired level of automation, and your budget when making your selection.

Leviton Decora Smart Switch Series

The Leviton Decora Smart Switch Series represents a cutting-edge line of smart home devices designed to enhance your lighting control and automation. These switches seamlessly integrate with popular smart home ecosystems, allowing you to manage your lights remotely, schedule lighting routines, and enjoy voice control. The Decora Smart Switch Series encompasses a range of models tailored to specific needs, including⁚

  • Decora Smart Wi-Fi Switches⁚ These switches offer wireless connectivity, allowing you to control your lights from anywhere using a smartphone app. They are compatible with both Android and iOS devices, providing a user-friendly interface for managing your lighting.
  • Decora Smart Motion Sensing Switches⁚ Combining the convenience of motion sensing with smart home capabilities, these switches automatically turn lights on when motion is detected and off when the area is empty. They can also be integrated with smart home systems for enhanced control and automation.
  • Decora Smart Dimmer Switches⁚ These switches allow you to dim your lights remotely, creating the perfect ambiance for any occasion. They can be controlled through a smartphone app or voice assistants, offering a seamless and intuitive user experience.

The Decora Smart Switch Series empowers homeowners to create a more comfortable, convenient, and energy-efficient living environment. With features like remote control, scheduling, and voice activation, these switches offer a level of control and automation previously unimaginable.

Decora Smart Wi-Fi Switches

Leviton Decora Smart Wi-Fi Switches are designed to bridge the gap between traditional light switches and the convenience of smart home technology. They offer a simple yet powerful way to control your lighting remotely, schedule automated routines, and even integrate with voice assistants. These switches utilize Wi-Fi connectivity, eliminating the need for a separate hub or bridge, making installation straightforward.

The Decora Smart Wi-Fi Switches provide a user-friendly interface through the My Leviton app. This app allows you to turn lights on or off from anywhere, dim the lights to set the mood, and create customized schedules based on your daily routines. The app also offers features like Away Mode, which automatically turns lights on and off at random times to give the appearance that someone is home, enhancing security while you’re away.

For even greater convenience, these switches can be integrated with popular voice assistants such as Amazon Alexa and Google Assistant. Simply use voice commands to control your lights, making it effortless to adjust your lighting without lifting a finger. Leviton Decora Smart Wi-Fi Switches bring the power of smart home technology to your lighting, offering a simple yet effective way to enhance your home’s comfort, convenience, and security.

Decora Smart Motion Sensing Switches

Leviton Decora Smart Motion Sensing Switches combine the convenience of motion activation with the versatility of smart technology. These switches are designed to automatically turn lights on when motion is detected and off when the area is unoccupied, offering energy savings and enhanced security. They feature a wide field of view, ensuring that motion is detected even in dimly lit areas.

The Decora Smart Motion Sensing Switches can be customized to meet specific needs. The time-out setting can be adjusted to determine how long the lights remain on after motion is detected. The sensitivity level can also be adjusted to minimize false activations from small movements or pets. These switches can be used in various locations, such as hallways, stairwells, bathrooms, or outdoor areas, where automatic lighting control is desired.

For added convenience, these switches can be integrated with the My Leviton app, allowing you to control the lights remotely and adjust settings. You can also use voice assistants like Amazon Alexa and Google Assistant to activate or deactivate the motion sensing feature. Leviton Decora Smart Motion Sensing Switches offer a blend of convenience, energy efficiency, and security, making them a practical choice for enhancing lighting control in your home.

Decora Smart Dimmer Switches

Leviton Decora Smart Dimmer Switches offer the ability to control the brightness of your lights with ease and precision. These switches allow you to create the perfect ambiance for any occasion, whether you’re setting the mood for a romantic dinner or simply adjusting the lighting for a comfortable reading session. They feature a smooth dimming action that provides a gradual transition from bright to low light levels, ensuring a comfortable and aesthetically pleasing experience.

Decora Smart Dimmer Switches are compatible with a variety of light bulbs, including incandescent, LED, and CFL. They also offer features that enhance convenience and energy efficiency. Many models include a locator light, which illuminates the switch in the dark, making it easy to find. Some models also feature a built-in timer that allows you to set a schedule for automatic dimming or turning off the lights, contributing to energy savings.

Just like other Decora Smart Switches, these dimmer switches can be integrated with the My Leviton app and voice assistants for remote control and automation. You can adjust the brightness levels, create lighting schedules, and even set up scenes to control multiple lights simultaneously. Leviton Decora Smart Dimmer Switches offer a sophisticated and versatile way to control your home’s lighting while enhancing energy efficiency and creating a more comfortable and inviting atmosphere.

Leviton Decora Digital Switch Series

The Leviton Decora Digital Switch Series offers a blend of traditional functionality and advanced features, making them a versatile option for various residential and commercial applications. These switches provide reliable control over lighting circuits while incorporating innovative technologies for enhanced convenience and energy savings. Decora Digital Switches stand out for their ability to integrate with various automation systems, allowing for seamless control and scheduling of lighting fixtures.

These switches often come equipped with built-in timers, enabling you to set schedules for automatic on/off actions. This feature is particularly useful for creating automated lighting sequences that mimic occupancy patterns, reducing energy consumption and enhancing security. Decora Digital Switches also offer compatibility with various smart home platforms, allowing you to control them remotely using mobile devices or voice assistants.

The Decora Digital Switch Series is designed for easy installation and compatibility with standard wiring configurations. They offer a sleek and modern aesthetic, seamlessly blending into various interior designs. Whether you’re seeking to simplify your lighting control, enhance energy efficiency, or integrate your lighting system into a smart home ecosystem, the Leviton Decora Digital Switch Series provides a reliable and feature-rich solution.

Installing Leviton Light Switches

Installing Leviton light switches is a straightforward process that can be accomplished with basic electrical knowledge and the right tools. Before you begin, it’s crucial to ensure that the power is turned off at the circuit breaker to prevent electrical shock. Always use a voltage tester to confirm that the circuit is de-energized before working on any wiring.

The first step involves removing the existing switch plate and switch from the electrical box. Carefully disconnect the wires from the old switch, noting the color coding of each wire (typically black for hot, white for neutral, and green or bare copper for ground). After removing the old switch, you can connect the wires to the new Leviton switch, matching the colors.

Leviton provides detailed installation instructions in their manuals, which you can find online or on the product packaging. These instructions will guide you through the specific wiring configurations for different switch types, such as single-pole, three-way, or dimmer switches. Once the wires are connected, secure the switch to the electrical box using the provided screws. Reinstall the switch plate and turn the power back on at the circuit breaker. Test the switch to ensure it functions correctly before using it for lighting control.

Troubleshooting Leviton Light Switches

While Leviton light switches are generally reliable, occasional issues may arise. Here are some common troubleshooting steps to address problems with your Leviton light switch⁚

Check the Power Supply⁚ Ensure the circuit breaker controlling the light switch is turned on. Use a voltage tester to verify that power is reaching the switch. If there’s no power, check the circuit breaker and fuse box for any tripped breakers or blown fuses.

Inspect the Wiring Connections⁚ Carefully examine the wiring connections at the switch and in the electrical box. Loose connections or incorrect wiring can cause malfunctions. Tighten any loose screws and ensure all wires are properly connected according to the Leviton manual.

Test the Switch⁚ Use a multimeter or test light to check for continuity between the switch terminals. If there’s no continuity, the switch may be faulty and needs replacement.

Check the Load⁚ If the light switch controls a light fixture, inspect the fixture’s bulb and wiring. A blown bulb or faulty wiring in the fixture can prevent the light from turning on.

Consider Environmental Factors⁚ If the light switch is located in a humid or damp environment, it could be affected by moisture. Ensure proper ventilation and consider using a weatherproof switch if necessary.

If these troubleshooting steps don’t resolve the issue, it’s recommended to consult with a qualified electrician for further assistance.

Frequently Asked Questions

Here are some common questions about Leviton light switches, along with their answers⁚

Q⁚ How do I find the manual for my Leviton light switch?

A⁚ You can find Leviton light switch manuals on the Leviton website, under their product support section. You’ll need to know the model number of your switch, which is usually found on the switch itself or on the packaging.

Q⁚ What app do I need to use with my Leviton smart dimmer or switch?

A⁚ Leviton smart dimmers and switches typically use the My Leviton app, which is available for both iOS and Android devices. The app allows you to control your lights remotely, set schedules, and create custom scenes.

Q⁚ How do I program my Leviton Decora motion sensor light switch?

A⁚ Programming a Leviton Decora motion sensor light switch involves adjusting settings like the time-out delay and light level; You can find detailed instructions in the user manual or on the Leviton website.

Q⁚ What are the differences between Leviton Decora Smart Wi-Fi switches and Decora Smart Motion Sensing switches?

A⁚ Decora Smart Wi-Fi switches allow for remote control and automation via the My Leviton app, while Decora Smart Motion Sensing switches use motion detection to automatically turn lights on and off.

If you have any further questions, you can refer to the Leviton website, contact their customer support, or consult with a qualified electrician.

Leviton Light Switch Manuals⁚ Where to Find Them

Finding the right Leviton light switch manual is essential for understanding its features, installation process, and troubleshooting tips. Fortunately, Leviton provides several resources for accessing their manuals⁚

Leviton Website⁚ The most comprehensive source for Leviton manuals is their official website. Navigate to their product support section, where you can search by product category, model number, or keyword.

Product Packaging⁚ Many Leviton light switches come with a physical manual included in the packaging. Check the box or the instruction sheet for the manual.

Leviton Customer Support⁚ If you can’t find the manual online or in the packaging, you can contact Leviton customer support. They can assist you in finding the right manual for your specific switch.

Online Retailers⁚ Some online retailers like Amazon or Home Depot may offer downloadable manuals for Leviton products on their product pages.

Third-Party Websites⁚ Websites like ManualsLib or the ManualsPlus app offer a vast library of user manuals, including those for Leviton light switches. You can search for your specific model using the search bar.

By utilizing these resources, you can easily locate the Leviton light switch manual you need to ensure proper installation, operation, and maintenance of your switches.

hayward h-series pool heater manual

Hayward H-Series Pool Heater Manual⁚ A Comprehensive Guide

This comprehensive guide provides a detailed overview of the Hayward H-Series pool heater, covering everything from its key features to installation, operation, maintenance, troubleshooting, safety precautions, parts diagrams, warranty information, and contact details. Whether you are a seasoned pool owner or a first-time user, this manual will serve as a valuable resource to ensure your Hayward H-Series pool heater operates efficiently and safely for years to come.

Introduction

Welcome to the comprehensive guide for the Hayward H-Series pool heater, a leading choice for homeowners seeking efficient and reliable pool heating solutions. This manual is designed to provide you with all the information you need to understand, install, operate, maintain, and troubleshoot your Hayward H-Series pool heater. From its innovative features to essential safety precautions, this guide will empower you to maximize the performance and longevity of your heater.

The Hayward H-Series gas heater stands out as one of the most energy-efficient pool and spa heating solutions available. Its groundbreaking hydraulic design reduces pump circulation run time, resulting in significant cost savings for pool owners. The H-Series is also known for its adaptability, making it a versatile choice for a variety of pool setups.

This manual is your go-to resource for everything related to your Hayward H-Series pool heater. It will guide you through the installation process, explain the various operating modes, provide detailed maintenance tips, and help you troubleshoot common issues. By carefully following the instructions outlined in this manual, you can ensure your pool heater operates efficiently and safely, providing you with years of warm swimming enjoyment.

Key Features of the Hayward H-Series

The Hayward H-Series pool heater boasts a range of innovative features designed to enhance efficiency, performance, and ease of use; Here are some of the key highlights that make the H-Series a top choice for pool owners⁚

  • Energy Efficiency⁚ The H-Series is renowned for its energy efficiency, thanks to its advanced hydraulic design that minimizes pump run time. This translates into lower energy bills and a reduced environmental footprint.
  • High Performance⁚ This heater delivers powerful heating capabilities, ensuring your pool water reaches and maintains your desired temperature quickly and efficiently.
  • Installation Adaptability⁚ The H-Series is designed for easy installation and compatibility with various pool setups. Its versatile design allows it to be integrated seamlessly into your existing pool system.
  • Cupro Nickel Heat Exchanger⁚ The H-Series features a durable cupro nickel heat exchanger, known for its excellent resistance to saltwater and chemical corrosion. This ensures long-lasting performance and reliability.
  • Low NOx Emissions⁚ The H-Series adheres to stringent clean air quality standards by producing low NOx emissions, minimizing its impact on the environment.
  • Totally Managed Water Flow⁚ The H-Series boasts a unique design that ensures consistent water velocity through all tubes, leading to faster heating times and improved overall efficiency.
  • Patented Header By-Pass Design⁚ The H-Series incorporates a patented header by-pass design that further reduces pump run time, contributing to significant cost savings for pool owners.

These innovative features make the Hayward H-Series a standout choice for pool owners seeking a combination of high performance, energy efficiency, and user-friendly operation.

Installation and Setup

The installation and setup of a Hayward H-Series pool heater should be performed by qualified professionals with expertise in pool equipment installation. Improper installation can lead to safety hazards and compromise the heater’s performance. The installation process typically involves the following steps⁚

  1. Location Selection⁚ Choose a suitable location for the heater, ensuring adequate ventilation, proximity to gas lines, and accessibility for maintenance. Refer to the installation manual for specific requirements.
  2. Gas Line Connection⁚ Connect the heater to the gas line, ensuring proper sizing and safety precautions. This step requires professional expertise and adherence to local gas codes.
  3. Plumbing Connection⁚ Connect the heater to the pool’s plumbing system, using the appropriate fittings and ensuring proper sealing to prevent leaks.
  4. Electrical Connection⁚ Connect the heater to the electrical system, ensuring a dedicated circuit with the correct voltage and amperage. Refer to the manual for specific wiring instructions.
  5. Control Panel Setup⁚ Configure the control panel settings, including the desired temperature, operation modes, and safety features. Follow the manual’s instructions for setting up these parameters.
  6. Testing and Commissioning⁚ Once the installation is complete, test the heater to ensure it operates correctly and meets the specified performance criteria.

Proper installation and setup are crucial for the safe and efficient operation of your Hayward H-Series pool heater. Always consult the installation manual for detailed instructions and seek professional assistance when necessary.

Operation and Maintenance

Operating and maintaining your Hayward H-Series pool heater correctly ensures its longevity and optimal performance. Regular maintenance helps prevent issues and ensures safe operation. Here are essential operational and maintenance practices⁚

  • Regularly Monitor the Heater⁚ Observe the heater’s operation, checking for any unusual noises, smells, or performance changes. This early detection can prevent potential issues.
  • Clean the Filter⁚ A clean filter is essential for efficient heater operation. Regularly clean or replace the filter according to the manufacturer’s recommendations.
  • Inspect the Heat Exchanger⁚ The heat exchanger is a vital component. Inspect it for any signs of corrosion or scaling. Consult the manual for cleaning instructions or professional cleaning services.
  • Check Gas Pressure⁚ Ensure the gas pressure is within the specified range by consulting the heater’s data plate and following the manual’s instructions for testing and adjusting the gas pressure.
  • Winterization⁚ Proper winterization protects the heater from freezing damage. Consult the manual for specific instructions on winterizing the heater.
  • Service and Maintenance⁚ Schedule regular service and maintenance checks with a qualified pool professional to ensure the heater’s optimal performance and safety.

Adhering to these operational and maintenance guidelines will help you maximize your Hayward H-Series pool heater’s performance and extend its lifespan. Always consult the owner’s manual for specific instructions and seek professional assistance when necessary.

Troubleshooting Common Issues

While Hayward H-Series pool heaters are designed for reliability, occasional issues may arise. Here’s a guide to troubleshooting some common problems, along with potential solutions⁚

  • Heater Not Igniting⁚ Check the gas supply, ensuring the valve is open and the gas pressure is adequate. Examine the flame sensor for soot buildup and clean it if necessary. Verify the igniter is functioning correctly. If the issue persists, consult the manual or contact a qualified technician.
  • Heater Not Heating⁚ Inspect the flow switch to ensure it is functioning properly. Check the circulation pump for proper operation. Verify that the thermostat is set to the desired temperature and is receiving power. Examine the heat exchanger for any blockages or corrosion. If the problem remains, seek professional assistance.
  • Heater Overheating⁚ Check the thermostat setting and ensure it is not set too high. Inspect the flow switch and circulation pump for proper functioning. If the problem persists, contact a qualified technician.
  • Unusual Noises⁚ Loud noises or banging sounds could indicate a problem with the heat exchanger, gas valve, or circulation pump. Consult the manual or contact a qualified technician for diagnosis and repair.
  • Error Codes⁚ The heater may display error codes indicating specific issues. Refer to the manual for the meaning of the error codes and troubleshooting steps. If the issue persists, seek professional assistance.

This troubleshooting guide provides basic steps for addressing common issues. If you are unable to resolve the problem, or if the situation involves potential hazards, consult a qualified pool professional for assistance.

Safety Precautions

The Hayward H-Series pool heater is designed for safe operation, but it is crucial to follow these safety precautions to prevent accidents and potential hazards⁚

  • Professional Installation⁚ Always have the heater installed by a qualified professional. Improper installation can lead to gas leaks, electrical hazards, and other safety risks.
  • Gas Supply Safety⁚ Ensure the gas supply line is properly sealed and inspected regularly for leaks. Use a soapy water solution to check for leaks. Never operate the heater if you suspect a gas leak. Immediately evacuate the area and contact a qualified technician.
  • Electrical Safety⁚ The heater’s electrical components should be properly wired and grounded according to local codes. Never attempt to repair electrical components yourself. Contact a qualified electrician for any repairs or modifications.
  • Combustion Products⁚ The heater produces combustion byproducts, including carbon monoxide, which is a colorless and odorless gas that can be deadly. Install a carbon monoxide detector near the heater and ensure adequate ventilation in the heater room.
  • Child Safety⁚ Keep children away from the heater to prevent burns or other accidents. Install safety barriers or fences around the heater to restrict access.
  • Heater Operation⁚ Never operate the heater if the water flow is restricted or if there are any signs of malfunction. Always follow the manufacturer’s instructions for operating the heater.
  • Maintenance and Service⁚ Regularly inspect and maintain the heater according to the manufacturer’s recommendations. Contact a qualified technician for any repairs or service.

By adhering to these safety precautions, you can ensure the safe operation of your Hayward H-Series pool heater and enjoy years of worry-free pool enjoyment.

Parts and Diagrams

The Hayward H-Series pool heater manual includes detailed parts diagrams and lists to assist you in identifying and ordering replacement parts. These diagrams are essential for understanding the heater’s components and their functions. They also provide a visual guide for locating specific parts during maintenance or repairs.

The parts diagrams typically include⁚

  • Component Identification⁚ Each part is labeled with a unique number and a description, making it easy to identify and locate.
  • Part Numbers⁚ The diagrams provide the corresponding part numbers for each component, simplifying the ordering process.
  • Assembly Views⁚ Multiple views of the heater are often provided to showcase the arrangement of parts and their relationships to one another.
  • Exploded Diagrams⁚ Exploded diagrams show how the heater is assembled, making it easier to understand the function of each part and how they interact.

By referring to the parts diagrams and lists, you can easily identify and order the replacement parts you need for your Hayward H-Series pool heater. This ensures that you are using genuine Hayward parts, which are designed to meet the highest quality standards and ensure optimal performance.

Warranty Information

The Hayward H-Series pool heater comes with a comprehensive warranty that protects your investment and provides peace of mind. The specific warranty terms may vary depending on the model and purchase date, so it is crucial to carefully review the warranty information provided in your manual.

Generally, the warranty covers defects in materials and workmanship for a specific period. It may also include coverage for certain components, such as the heat exchanger, for an extended period. Understanding the warranty terms will help you determine what is covered and what is not, allowing you to make informed decisions regarding repairs and replacements.

The manual will also provide details on how to file a warranty claim. This typically involves providing proof of purchase, a description of the issue, and possibly photographs or videos. It is always advisable to contact Hayward customer service for guidance on filing a claim. They can assist you with the process and answer any questions you may have.

hamilton beach fryer manual

Hamilton Beach Fryer Manual⁚ A Comprehensive Guide

This manual provides a comprehensive guide to using and maintaining your Hamilton Beach Fryer. It covers everything from assembling the fryer to troubleshooting common issues and includes a variety of recipes and cooking tips.

Introduction

Welcome to the world of crispy, golden-brown fried foods with your Hamilton Beach Fryer! This manual is your comprehensive guide to using and maintaining your new appliance, ensuring you get the most out of its capabilities and enjoy delicious results every time.

Whether you’re a seasoned chef or a novice in the kitchen, this manual will equip you with the knowledge and confidence to fry everything from classic French fries to delicate seafood with ease.

From assembly and operation to cleaning and troubleshooting, we’ve covered every aspect of using your Hamilton Beach Fryer.

We’ve also included a collection of mouthwatering recipes, designed to inspire you to explore the world of deep-fried delights.

So, grab your ingredients, put on your apron, and get ready to embark on a culinary adventure with your Hamilton Beach Fryer!

Assembling Your Hamilton Beach Fryer

Assembling your Hamilton Beach Fryer is a straightforward process, designed for convenience and user-friendliness.

Place the base on a stable, flat surface. This ensures stability and prevents accidental spills or movement during operation.

Insert the oil pot into the base.

Align the grooves of the Heating Element Assembly with the grooves on the base. This step ensures proper connection and efficient heat distribution.

Push down on the Heating Element Assembly to secure it in place.

Carefully place the lid on the fryer.

Attach the frying basket to the fryer;

Ensure the fryer is plugged into a grounded electrical outlet.

Now you’re ready to embark on your frying adventures!

Remember to consult your specific model’s user manual for detailed instructions and illustrations, as variations may exist between different Hamilton Beach Fryer models.

Frying with Your Hamilton Beach Fryer

Frying with your Hamilton Beach Fryer is a simple yet rewarding experience, allowing you to create crispy, flavorful dishes in the comfort of your own kitchen. Here’s a step-by-step guide to help you get started⁚

Fill the oil pot with the appropriate amount of oil. Never fill the oil pot above the MAX fill mark, as this could lead to spills and potential hazards.

Plug in the fryer and set the desired temperature using the thermostat. Allow the oil to reach the desired temperature before adding food.

Prepare your food items. Dry food thoroughly before placing it in the frying basket, as excess moisture can cause oil to splatter.

Carefully lower the basket into the hot oil. Avoid overcrowding the basket, as this can lower the oil temperature and prevent food from cooking evenly.

Fry the food according to the recommended time and temperature. Consult your specific recipe or the frying chart in your user manual for guidance.

Remove the basket from the fryer using the handle. Allow the food to drain on paper towels before serving.

Always supervise the fryer while it’s in operation. Never leave the fryer unattended while it’s plugged in and hot.

By following these simple instructions, you’ll be able to create delicious, crispy fried foods with ease.

Cleaning Your Hamilton Beach Fryer

Maintaining a clean Hamilton Beach Fryer is essential for ensuring optimal performance and preventing unpleasant odors. Here’s a step-by-step guide to cleaning your fryer after each use⁚

Allow the oil to cool completely before attempting any cleaning. Hot oil can cause severe burns, so exercise extreme caution.

Unplug the fryer and remove the lid and frying basket. Set these components aside to cool separately.

Carefully pour the used oil into a heat-safe container for disposal. Never pour hot oil down the drain, as it can solidify and cause clogs.

Wash the oil pot, lid, and frying basket with warm, soapy water. Use a non-abrasive sponge or brush to remove any food residue or oil buildup.

Rinse all components thoroughly and dry them completely. Ensure that no moisture remains on the fryer parts before reassembling them.

Clean the exterior of the fryer with a damp cloth and mild detergent. Avoid using abrasive cleaners or scouring pads, as they can damage the finish.

Wipe down the heating element with a damp cloth. Avoid submerging the heating element in water, as this could pose a safety hazard.

Reassemble the fryer and store it in a cool, dry place. Always ensure that the fryer is completely dry before storing it to prevent rust formation.

By following these cleaning procedures, you’ll keep your Hamilton Beach Fryer in excellent condition and ready for your next frying adventure.

Troubleshooting Common Issues

While Hamilton Beach fryers are designed for reliability, occasional issues may arise. Here’s a guide to troubleshooting some common problems⁚

Fryer Not Heating⁚

Check if the fryer is plugged in securely. Ensure the outlet is working by testing it with another appliance.
Inspect the power cord for any damage or fraying. Replace the cord if necessary.
Verify that the thermostat is set to the desired temperature. Ensure the temperature dial is turned to a suitable setting for frying.

Oil Foaming Excessively⁚

Ensure that the food is thoroughly dried before frying. Excess moisture can cause oil to foam.
Avoid overcrowding the frying basket. Give food ample space to cook evenly.
Consider changing the oil more frequently. Used oil can contribute to excessive foaming.

Fried Food Not Crispy⁚

Check if the fryer is preheated to the correct temperature. Preheat the oil to the recommended temperature for the type of food you’re frying.
Adjust the frying time accordingly. Ensure food is fried for the appropriate duration to achieve desired crispness.
Ensure that the oil is clean and fresh. Replace the oil regularly for optimal frying results.

Smoke or Odor⁚

Clean the fryer thoroughly after each use. Accumulated food particles can cause smoke and odors.
Avoid overcrowding the frying basket. Overcrowding can lead to uneven cooking and excessive smoke.

If these troubleshooting tips don’t resolve the issue, consult the detailed user manual for your specific model or contact Hamilton Beach customer service for further assistance.

Recipes and Cooking Tips

Your Hamilton Beach fryer opens up a world of crispy, delicious possibilities. Here are some recipe ideas and tips to get you started⁚

Classic Favorites⁚

  • French Fries⁚ Cut potatoes into thin strips, soak them in cold water for 15 minutes, then fry them until golden brown and crispy.
  • Chicken Wings⁚ Fry chicken wings until cooked through and crispy. Toss them in your favorite sauce for a flavorful treat.
  • Onion Rings⁚ Coat onion slices in batter or bread crumbs and fry them until golden and crunchy.
  • Mozzarella Sticks⁚ Dip mozzarella sticks in batter or bread crumbs and fry them until the cheese is melted and gooey.

Beyond the Basics⁚

  • Shrimp Tempura⁚ Coat shrimp in a light tempura batter and fry them until they are golden brown and crispy. Serve with a dipping sauce.
  • Sweet Potato Fries⁚ Cut sweet potatoes into thin strips and fry them until they are caramelized and crispy. Season with salt, pepper, and cinnamon for a sweet and savory treat.
  • Chicken Tenders⁚ Dip chicken tenders in batter or bread crumbs and fry them until they are cooked through and crispy.
  • Fried Pickles⁚ Coat pickle slices in batter or bread crumbs and fry them until they are crispy and golden brown. Serve with a dipping sauce.

Tips for Success⁚

  • Preheat the oil to the correct temperature⁚ This will ensure that food cooks evenly and develops a crispy exterior.
  • Don’t overcrowd the frying basket⁚ Give food ample space to cook evenly.
  • Fry in batches⁚ This will prevent the temperature of the oil from dropping too much.
  • Drain the food on paper towels⁚ This will remove excess oil and prevent food from becoming soggy.

Safety Precautions

Your Hamilton Beach Fryer is designed for safe and enjoyable cooking. However, it’s essential to follow these safety precautions to prevent accidents and ensure a positive experience⁚

  • Never leave the fryer unattended while in use⁚ Hot oil can ignite quickly, so always stay nearby and monitor the fryer closely.
  • Never fill the oil pot above the MAX fill line⁚ Overfilling can lead to oil spills and create a fire hazard.
  • Never move the fryer when it is in operation or contains hot oil⁚ Moving the fryer can cause spills and burns. Allow the oil to cool completely before moving the fryer.
  • Keep the fryer away from flammable materials⁚ Store the fryer in a dry, well-ventilated area and keep it away from curtains, paper, and other flammable materials.
  • Use caution when handling hot oil⁚ Always use oven mitts or pot holders when handling the fryer, basket, and oil.
  • Never immerse the fryer in water⁚ This could cause a short circuit and create a fire hazard.
  • Unplug the fryer when not in use⁚ This will help prevent accidents and ensure safety.
  • Keep the fryer cord away from heat sources⁚ Avoid placing the cord near a stovetop, oven, or other heat sources.
  • Do not use the fryer with a damaged cord or plug⁚ If the cord or plug is damaged, discontinue use and contact the manufacturer for repair or replacement.
  • Do not use the fryer for any purpose other than deep frying⁚ Using the fryer for any other purpose can be dangerous.

By following these safety precautions, you can enjoy safe and delicious deep frying with your Hamilton Beach Fryer.

Warranty Information

Hamilton Beach stands behind the quality of its products and offers a limited warranty to provide peace of mind for consumers. The specific warranty terms may vary depending on the model and region of purchase. Generally, Hamilton Beach fryers are warranted to be free from defects in materials and workmanship for a period of one year from the date of original purchase. This warranty covers normal household use and excludes damage caused by misuse, neglect, accidents, or unauthorized repairs.

To obtain warranty service, you will typically need to provide proof of purchase, such as a dated sales receipt. It is recommended to register your Hamilton Beach fryer online or by mail to ensure that you receive timely and efficient service should you need it. The registration process typically involves providing your name, address, and the model number of your appliance.

For warranty service, you can contact Hamilton Beach customer service directly by phone or email. They can provide guidance on how to proceed with your warranty claim and direct you to an authorized service center if necessary.

Remember to keep your warranty information readily available for future reference, as it outlines your rights and responsibilities as a consumer.