Presto 16-Quart Pressure Canner and Cooker⁚ A Comprehensive Guide
This comprehensive guide provides a detailed overview of the Presto 16-quart pressure canner and cooker‚ exploring its key features‚ benefits‚ and practical applications. Discover the art of pressure canning‚ water bath canning‚ and pressure cooking with this versatile appliance‚ ensuring safe and efficient food preservation and preparation. Learn about safety precautions‚ maintenance tips‚ troubleshooting common issues‚ and find valuable recipes and resources to enhance your culinary endeavors.
Introduction
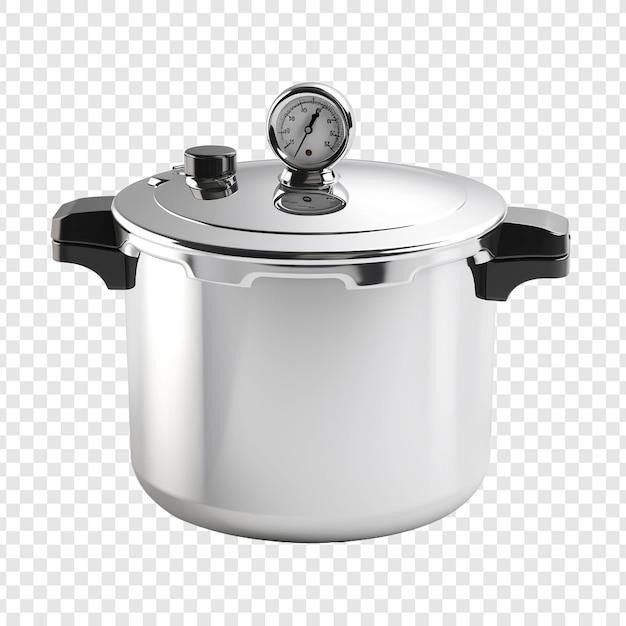
The Presto 16-quart pressure canner and cooker is a versatile kitchen appliance that combines the convenience of pressure cooking with the safety and reliability of pressure canning. This comprehensive guide delves into the world of the Presto 16-quart pressure canner‚ exploring its capabilities‚ features‚ and how it can transform your culinary experience. Whether you’re a seasoned home cook or just starting out‚ this manual will provide you with the knowledge and confidence to use this appliance effectively and safely.
This guide will cover everything from the basics of pressure canning and pressure cooking to advanced techniques and troubleshooting tips. We’ll discuss the key features and benefits of the Presto 16-quart pressure canner‚ along with essential safety precautions and maintenance practices. We’ll also provide a selection of recipes and resources to inspire your culinary creativity.
By the end of this guide‚ you’ll have a thorough understanding of the Presto 16-quart pressure canner and be equipped to confidently use it for preserving and preparing delicious meals.
Key Features and Benefits
The Presto 16-quart pressure canner and cooker boasts a range of features that make it a valuable addition to any kitchen. Its large capacity allows you to preserve and cook large batches of food‚ making it ideal for families or those who enjoy meal prepping. The adjustable regulator ensures consistent pressure levels‚ guaranteeing safe and effective canning and cooking processes. The Presto 16-quart pressure canner is also compatible with a wide range of stovetops‚ including gas‚ electric‚ and smooth-top ranges‚ offering flexibility and convenience.
One of the key benefits of the Presto 16-quart pressure canner is its versatility. It can be used for both pressure canning and water bath canning‚ allowing you to preserve a wide variety of foods‚ including vegetables‚ fruits‚ meats‚ poultry‚ and seafood. Its pressure cooking capabilities also offer a quick and efficient way to prepare delicious meals‚ reducing cooking times significantly. With its durable construction and reliable performance‚ the Presto 16-quart pressure canner is a long-lasting investment that will serve you well for years to come.
Pressure Canning with the Presto 16-Quart Canner
Pressure canning is the recommended method for preserving low-acid foods such as vegetables‚ meats‚ poultry‚ and seafood. The Presto 16-quart canner excels at this task‚ offering ample space for processing large quantities of food. The canner utilizes steam pressure to create a hot‚ sterile environment that eliminates harmful bacteria and preserves the quality of your food. The adjustable regulator allows you to set the desired pressure level‚ ensuring safe and effective canning.
The Presto 16-quart canner includes a rack that elevates jars above the bottom of the canner‚ allowing for even heat distribution and preventing direct contact with the hot bottom. Before using the canner‚ ensure it’s clean and in good condition. Follow the detailed instructions in the user manual for proper filling‚ processing times‚ and safety procedures. Remember to use tested and proven recipes from reliable sources‚ such as the USDA‚ for optimal results.
Water Bath Canning with the Presto 16-Quart Canner
While primarily designed for pressure canning‚ the Presto 16-quart canner can also be used for water bath canning‚ a method suitable for preserving high-acid foods like fruits‚ jams‚ jellies‚ pickles‚ and salsa. This method involves immersing sealed jars in boiling water for a specific duration to eliminate harmful bacteria and create a vacuum seal. The Presto 16-quart canner’s large capacity allows you to process multiple jars simultaneously‚ making it efficient for preserving larger quantities of high-acid foods.
When using the canner for water bath canning‚ ensure the water level covers the jars by at least an inch. Maintain a consistent simmering temperature throughout the processing time‚ adjusting the heat as needed. Remember to follow tested recipes and processing times from reliable sources like the USDA for safe and successful water bath canning. The Presto 16-quart canner’s versatility extends to both pressure and water bath canning‚ making it a valuable tool for preserving a wide variety of foods.
Pressure Cooking with the Presto 16-Quart Canner
Beyond its pressure canning capabilities‚ the Presto 16-quart canner excels as a pressure cooker‚ significantly reducing cooking times and tenderizing tough cuts of meat. Its large capacity allows you to prepare meals for a family or a group of friends‚ making it ideal for pot roasts‚ stews‚ soups‚ and beans. The adjustable regulator lets you control the pressure level‚ ensuring optimal results for various recipes.
When pressure cooking‚ follow the instructions in your Presto 16-quart canner manual for safe and efficient operation. Ensure the pressure gauge is functioning properly and that the vent is closed securely. Release pressure carefully after cooking‚ allowing the steam to escape naturally before manually venting. The Presto 16-quart canner’s pressure cooking capabilities open a world of culinary possibilities‚ making it a versatile and efficient addition to your kitchen.
Safety Precautions and Maintenance
Prioritize safety when using your Presto 16-quart pressure canner and cooker. Always consult the instruction manual for detailed safety guidelines. Never operate the canner without a properly fitted lid and ensure the vent is functioning correctly. Avoid overfilling the canner and never use it on a stovetop with a damaged or cracked bottom. Regularly inspect the sealing ring‚ replacing it if it shows signs of wear or damage. Clean the canner thoroughly after each use‚ removing any food residue and ensuring the sealing ring is properly cleaned and dried.
Store the canner in a cool‚ dry place‚ away from direct sunlight. Avoid exposing the canner to harsh chemicals or cleaning agents. By adhering to these safety precautions and proper maintenance practices‚ you can extend the lifespan of your Presto 16-quart pressure canner and cooker‚ ensuring its reliable performance for years to come.
Recipes and Resources
Unlock a world of culinary possibilities with the Presto 16-quart pressure canner and cooker. The included instruction manual features a wealth of recipes for pressure canning‚ water bath canning‚ and pressure cooking. Explore a diverse range of options‚ from preserving fresh vegetables and fruits to preparing hearty stews‚ soups‚ and meats. Beyond the manual‚ numerous online resources offer inspiration and guidance. Websites like the National Center for Home Food Preservation provide comprehensive information on safe and effective canning techniques‚ along with a vast library of tested recipes.
For additional recipe ideas and tips‚ consider joining online communities dedicated to pressure canning and cooking. These forums offer a platform to exchange recipes‚ share experiences‚ and seek advice from fellow enthusiasts. Embrace the versatility of your Presto 16-quart pressure canner and cooker‚ and embark on a journey of culinary creativity‚ exploring a world of delicious possibilities.
Troubleshooting and Common Issues
While the Presto 16-quart pressure canner and cooker is known for its reliability‚ occasional troubleshooting may be necessary. Common issues include inconsistent pressure build-up‚ leaking steam‚ or difficulty locking the lid. To address inconsistent pressure‚ ensure the vent is clear and the sealing ring is properly seated. For leaks‚ check the sealing ring for damage or wear‚ and ensure the lid is securely locked. If the lid won’t lock‚ inspect the locking mechanism for obstructions or misalignment.
Consult the instruction manual for detailed troubleshooting steps and potential solutions. If you encounter persistent problems‚ contact Presto customer support for guidance. Regular maintenance‚ including cleaning and inspecting the canner‚ can minimize the risk of issues. By addressing these potential challenges proactively‚ you can ensure a smooth and enjoyable experience with your Presto 16-quart pressure canner and cooker‚ enjoying its many benefits for years to come.
Comparison with Other Pressure Canners
The Presto 16-quart pressure canner and cooker stands out as a reliable and affordable option‚ particularly for those seeking a mid-sized model suitable for both canning and pressure cooking. It competes with other popular brands like All American and Mirro‚ offering a similar range of features and functionalities. However‚ the Presto model is known for its user-friendly design‚ with a straightforward locking mechanism and easy-to-read pressure gauge.
While other brands may offer more advanced features like electric models or specialized pressure settings‚ the Presto 16-quart pressure canner and cooker provides a robust and dependable solution for home cooks and canners. Its balance of affordability‚ ease of use‚ and versatility makes it a compelling choice for those looking to preserve food safely and efficiently‚ without sacrificing quality or convenience.
The Presto 16-quart pressure canner and cooker proves to be a valuable addition to any kitchen‚ offering a multifaceted approach to food preservation and preparation. Its ability to function as both a pressure canner and a pressure cooker provides versatility and efficiency‚ making it an ideal choice for home cooks and canners alike. With its durable construction‚ user-friendly design‚ and comprehensive instruction manual‚ this appliance ensures safe and reliable operation‚ enabling you to preserve fresh produce‚ prepare hearty meals‚ and enjoy the benefits of pressure cooking.
Whether you are a seasoned canner or just starting your culinary journey‚ the Presto 16-quart pressure canner and cooker empowers you to create delicious and wholesome meals while preserving the flavors and nutrients of your favorite ingredients. Its ease of use‚ affordability‚ and versatility make it a worthwhile investment for those seeking to elevate their culinary skills and enjoy the convenience and benefits of pressure cooking and canning.
Where to Buy and Find the Manual
The Presto 16-quart pressure canner and cooker is widely available online and in various retail stores. Popular online marketplaces like Amazon and Walmart offer competitive prices and convenient delivery options. Additionally‚ specialized kitchenware stores and department stores often carry Presto products‚ allowing for in-person browsing and purchase. To ensure you are purchasing the correct model‚ verify the model number‚ which is typically found on a tag attached to the cover‚ stamped on the bottom of the body‚ or stamped on the side of the body just below the body handle.
For those seeking the user manual‚ Presto provides a downloadable PDF version on their website. This comprehensive manual includes detailed instructions on using the pressure canner and cooker‚ safety precautions‚ maintenance tips‚ troubleshooting guides‚ and recipes. Alternatively‚ you can contact Presto customer service for assistance in obtaining a physical copy of the manual.