This manual provides instructions for installing the Aprilaire Model 700 humidifier․ It covers installation options‚ safety precautions‚ humidifier dimensions‚ installation template‚ parts list‚ wiring diagram‚ orientation of the Aprilaire Model 700‚ automatic and manual modes‚ troubleshooting‚ maintenance instructions‚ warranty information‚ and frequently asked questions․ The Model 700 can be installed on either the supply plenum or cold air return of a forced air handling system․ It is recommended to use hot water (140F max) to provide maximum evaporative capacity․ Please read all safety instructions and the installation template before starting the installation process․
Installation Options
The Aprilaire Model 700 and 700M can be installed in two primary locations within your forced air heating and cooling system⁚ the supply plenum and the cold air return․ The choice between these two options depends on several factors‚ including the specific layout of your HVAC system‚ the available space‚ and the accessibility for maintenance․
Supply Plenum Installation⁚ This installation method involves placing the humidifier directly within the supply plenum‚ the area where warm air is distributed throughout your home․ This is often the preferred option due to its ease of access for maintenance and the potential for improved humidification efficiency․ The humidifier sits within the warm air stream‚ allowing for optimal water evaporation and distribution of humidified air․
Cold Air Return Installation⁚ Alternatively‚ the humidifier can be installed in the cold air return‚ the area where air is drawn back into the HVAC system․ This option is often chosen in situations where space in the supply plenum is limited․ However‚ it’s important to note that the humidification efficiency might be slightly lower compared to a supply plenum installation because the water has to evaporate in a cooler air stream․
Regardless of the chosen installation method‚ it’s crucial to consider the humidifier’s dimensions and serviceability․ Ensure that the selected location allows for proper airflow‚ convenient access for maintenance‚ and sufficient clearance for the humidifier’s components․
Safety Precautions
Before you begin installing the Aprilaire Model 700 humidifier‚ it’s crucial to prioritize safety․ These precautions will help ensure a smooth and hazard-free installation process⁚
- Disconnect Electrical Power⁚ Prioritize safety by disconnecting the electrical power to the furnace before starting the installation․ This step eliminates the risk of electrical shock while working on the humidifier and HVAC system․
- Freezing Temperatures⁚ Avoid installing the humidifier in areas prone to freezing temperatures․ The water within the humidifier can freeze‚ potentially damaging the unit and leading to malfunctions․
- Hot Water⁚ While hot water is recommended for optimal performance‚ be cautious when handling it during the installation process․ Avoid direct contact with the hot water lines to prevent burns․
- Multi-Outlet Power Cord⁚ Do not connect the Model 700M or 700A power cord to a multi-outlet power cord․ This practice can overload the circuit and potentially cause electrical hazards․ Use a dedicated outlet designed for the humidifier․
- Qualified Installer⁚ For optimal installation and to ensure safety compliance‚ consider hiring a qualified HVAC technician for the installation process․ They possess the expertise and knowledge to handle the installation correctly and address any potential issues․
By adhering to these safety precautions‚ you can minimize risks and ensure a successful and safe installation of your Aprilaire Model 700 humidifier․
Humidifier Dimensions
Understanding the dimensions of the Aprilaire Model 700 humidifier is crucial for proper installation and ensuring sufficient space for the unit within your HVAC system․ The humidifier’s size and shape play a significant role in determining the best location for installation‚ ensuring ease of access for maintenance and service‚ and avoiding any potential interference with other components in the system․
Here are the key dimensions of the Aprilaire Model 700 humidifier⁚
- Width⁚ 15 inches․ This dimension indicates the horizontal space required for the humidifier within the supply plenum or cold air return․
- Height⁚ This dimension will vary depending on the specific model and configuration of the Aprilaire Model 700 humidifier․ Refer to the manufacturer’s specifications or the installation template for accurate height measurements․
- Depth⁚ Similar to the height‚ the depth will vary depending on the model and configuration․ Consulting the manufacturer’s documentation will provide precise depth measurements․
By carefully considering these dimensions‚ you can ensure a proper fit for the Aprilaire Model 700 humidifier within your HVAC system‚ allowing for efficient operation and easy maintenance․
Installation Template
The Aprilaire Model 700 installation template is an essential tool for ensuring proper installation and alignment of the humidifier within your HVAC system․ It serves as a visual guide‚ outlining the precise location and orientation of the humidifier in relation to the ductwork and other components․ By utilizing the template‚ you can avoid costly mistakes and ensure the humidifier is installed correctly for optimal performance․
The installation template typically includes⁚
- Cutout Dimensions⁚ The template will specify the exact size and shape of the opening required in the ductwork for installing the Aprilaire Model 700 humidifier․ This ensures a snug fit and prevents any air leaks․
- Mounting Points⁚ The template will indicate the locations for mounting the humidifier to the ductwork․ This ensures secure and stable installation and prevents the humidifier from shifting or vibrating during operation․
- Wiring Connections⁚ The template may also provide guidance on the location and connection points for the humidifier’s electrical wiring․ This helps ensure proper electrical connections and safe operation․
It is crucial to carefully follow the instructions provided with the installation template and ensure that the humidifier is installed in accordance with the template’s specifications․ This will ensure proper airflow‚ optimal performance‚ and a long lifespan for your Aprilaire Model 700 humidifier․
Parts List
The Aprilaire Model 700 humidifier comes with a comprehensive set of parts designed for efficient and reliable humidification․ Understanding the parts list is crucial for successful installation and maintenance․ It allows you to identify and locate components during the installation process and ensures you have all the necessary parts for a smooth operation․ Here’s a typical breakdown of the parts included with the Aprilaire Model 700⁚
- Humidifier Housing⁚ The main body of the humidifier‚ which houses the water panel‚ evaporator‚ and other essential components․
- Water Panel⁚ A replaceable component that absorbs water and releases it into the air stream for humidification․
- Evaporator⁚ A fan that circulates air over the water panel‚ promoting evaporation and increasing humidity levels․
- Humidifier Control⁚ A digital or manual control unit that regulates the humidifier’s operation‚ setting the desired humidity levels and adjusting the humidifier’s output․
- Wiring Harness⁚ Connects the humidifier control to the humidifier housing and provides power to the evaporator fan․
- Water Level Sensor⁚ Monitors the water level in the humidifier and shuts off the humidifier when the water level is low․
- Transformer⁚ Converts the standard household voltage to a lower voltage suitable for operating the humidifier’s control unit․
- Mounting Hardware⁚ Includes screws‚ brackets‚ and other fasteners for securely attaching the humidifier to the ductwork․
- Installation Template⁚ A visual guide used for proper placement and alignment of the humidifier during installation․
It’s important to note that specific parts may vary depending on the model and configuration of your Aprilaire Model 700 humidifier․ Refer to the user manual or contact Aprilaire customer support for detailed information about the parts included with your specific model․
Wiring Diagram
The wiring diagram for the Aprilaire Model 700 humidifier is a crucial guide for connecting the humidifier control‚ power source‚ and other components․ It ensures proper electrical connections‚ preventing short circuits and ensuring safe and efficient operation․ Understanding the wiring diagram is essential for a successful installation‚ and it’s recommended to consult it throughout the process․
The diagram typically shows the following components and their connections⁚
- Humidifier Control⁚ The digital or manual control unit that receives power from the transformer and controls the humidifier’s operation․
- Transformer⁚ Converts the standard household voltage to a lower voltage suitable for operating the humidifier’s control unit․
- Evaporator Fan⁚ The fan that circulates air over the water panel for humidification‚ receiving power from the humidifier control․
- Water Level Sensor⁚ Monitors the water level in the humidifier and shuts off the humidifier when the water level is low․
- Power Source⁚ The electrical outlet that provides power to the transformer and ultimately the humidifier’s control unit․
- Return Duct⁚ The duct where the humidifier is installed‚ connecting the humidifier control to the furnace’s control system․
The wiring diagram uses symbols and colors to represent different wires and their connections․ Carefully following the diagram’s instructions is crucial for proper wiring․ If you have any doubts or concerns about the wiring‚ consult the user manual or contact Aprilaire customer support for assistance․
Orientation of Aprilaire Model 700
The correct orientation of the Aprilaire Model 700 humidifier in relation to the cooling coils is crucial for optimal performance and efficiency․ The manufacturer’s instructions provide specific guidelines for positioning the humidifier to ensure proper air flow and prevent potential issues․
The recommended orientation is to install the humidifier on the supply plenum or cold air return of a forced air handling system․ The humidifier should be positioned so that the air flow from the furnace or air handler passes through the humidifier before reaching the supply plenum or cold air return․ This ensures that the air is properly humidified before entering the living spaces․
The orientation should also consider the location of the cooling coils․ The humidifier should be installed upstream of the cooling coils to prevent the humidifier from becoming blocked by the coils․ The manufacturer’s instructions will provide a clear illustration of the recommended orientation and any specific considerations based on the type of HVAC system․ Following these instructions will ensure a successful installation and optimal performance of the Aprilaire Model 700 humidifier․
Automatic Mode
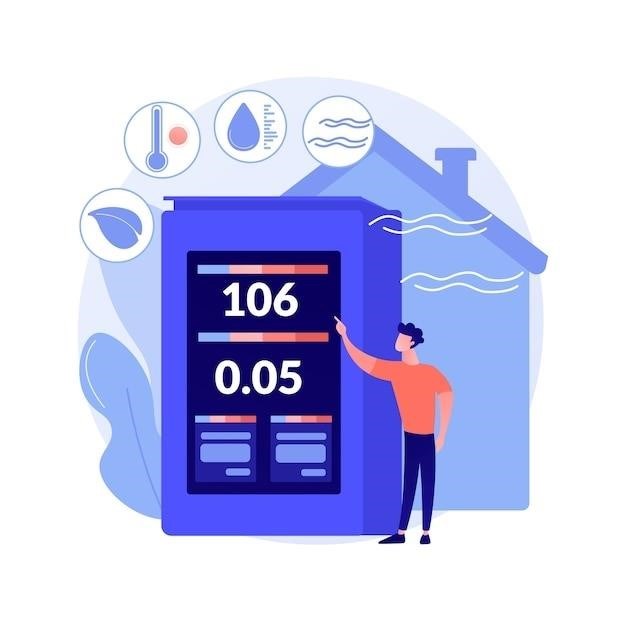
The Aprilaire Model 700 humidifier‚ when operating in automatic mode‚ offers a precise and convenient way to maintain desired humidity levels within your home․ This sophisticated system utilizes a digital control that monitors indoor and outdoor temperature fluctuations‚ automatically adjusting the humidity output to ensure a comfortable and healthy environment․
The control system features a built-in sensor that continuously measures the relative humidity (RH) inside your home․ It then compares this reading to the set point you’ve selected․ The set point represents the desired humidity level you want to maintain․ Based on these readings‚ the control automatically activates or deactivates the humidifier to adjust the humidity levels accordingly․
For every 1°F change in the outdoor temperature‚ the control automatically adjusts the indoor relative humidity by 1/2 (RH)․ This intelligent system compensates for temperature variations‚ ensuring that your home’s humidity remains within the desired range even as outdoor conditions change․ Automatic mode provides a worry-free approach to maintaining optimal humidity levels‚ creating a more comfortable and healthy living environment for you and your family․
Manual Mode
The Aprilaire Model 700 humidifier offers a manual mode option‚ providing you with direct control over the humidification process․ This mode allows you to manually adjust the humidity level to your preference‚ offering greater flexibility and control over the comfort of your home environment․
To utilize manual mode‚ simply rotate the control knob to the desired humidity setting․ The humidifier will activate whenever the HVAC system fan is running and the current humidity level is below the set point․ This allows you to fine-tune the humidity output based on your specific needs and preferences‚ ensuring optimal comfort throughout the day․
Manual mode is particularly useful in situations where you may want to temporarily adjust the humidity level for specific activities or preferences․ For example‚ you might choose to increase the humidity during dry winter months or lower it during humid summer days․ The manual control allows you to tailor the humidification process to your specific comfort requirements‚ creating a personalized environment that suits your needs․
Troubleshooting
While the Aprilaire Model 700 humidifier is designed for reliable operation‚ occasional issues may arise․ This section provides guidance on troubleshooting common problems to help you identify and resolve them efficiently․
If the humidifier is not producing sufficient moisture‚ check the water supply for adequate pressure and flow․ Ensure the water panel is clean and free of mineral buildup‚ which can hinder water absorption and evaporation․ Verify the HVAC system fan is running correctly‚ as it plays a crucial role in circulating humidified air throughout the house․
If the humidifier is producing excessive moisture‚ adjust the humidity setting lower․ Inspect the water level sensor for proper functioning‚ as a faulty sensor can lead to over-humidification․ If the humidifier is making unusual noises‚ check the water panel and fan for any obstructions or debris that may cause vibrations or rattling․
For persistent problems‚ consult the Aprilaire Model 700 installation manual for detailed troubleshooting steps and potential solutions․ If the issue persists‚ contact Aprilaire customer support for professional assistance and guidance․
Maintenance Instructions
Regular maintenance is essential for ensuring optimal performance and longevity of your Aprilaire Model 700 humidifier․ This section outlines key maintenance procedures to keep your humidifier running smoothly and effectively․
At least once a month‚ inspect the water panel for mineral buildup․ If present‚ clean it thoroughly using a solution of vinegar and water․ Rinse the water panel thoroughly and allow it to dry completely before reinstalling it․ Also‚ inspect the water level sensor for any blockages or debris that may impede its operation․ Clean the sensor gently with a soft brush or cloth․
Periodically‚ check the humidifier’s drain line for any clogs or blockages․ Clean the drain line with a pipe cleaner or similar tool to ensure proper drainage and prevent water from accumulating in the unit․
To ensure the humidifier’s proper operation‚ replace the water panel every two years‚ or sooner if it shows signs of wear and tear․ Refer to the Aprilaire Model 700 installation manual for detailed instructions on replacing the water panel․ By adhering to these maintenance recommendations‚ you can extend the lifespan of your Aprilaire Model 700 humidifier and enjoy consistent humidification throughout your home․
Warranty Information
Aprilaire offers a comprehensive warranty on its products‚ including the Model 700 humidifier․ The warranty covers defects in materials and workmanship under normal use and service conditions․ Specific warranty terms and conditions may vary depending on the purchase date and location of purchase․ It is essential to review the warranty documentation provided with your humidifier for complete details․
The warranty typically covers the humidifier’s components‚ including the water panel‚ control panel‚ and other essential parts․ However‚ the warranty may not cover damage caused by improper installation‚ misuse‚ neglect‚ or natural disasters․ To ensure your warranty coverage‚ it is recommended to have your Aprilaire Model 700 humidifier installed by a qualified professional and to follow the recommended maintenance procedures outlined in the installation manual․
In the event of a warranty claim‚ contact Aprilaire customer service for assistance․ Provide the model number‚ serial number‚ and purchase date for efficient processing of your claim․ Aprilaire’s warranty provides peace of mind and assurance that your humidifier is protected against manufacturing defects․